How To: Update Your Nexus Without Losing Root (No Computer Needed)
For many people, the two main advantages of buying a Nexus device are prompt updates and the ability to root without much hassle. But in a cruel twist of fate, these two features are almost mutually exclusive, since OTA updates will refuse to run on rooted devices.In the past, this has always meant that updating your rooted Nexus required hooking the device up to a computer and running complicated fastboot commands. But now, thanks to a recent update to a popular root app, we can finally apply firmware updates entirely from within Android.
Note About Major Android Version UpdatesThis method should not be used to update across major Android version bumps—for instance, from 6.0 Marshmallow to 7.0 Nougat. It's perfectly fine for minor updates like monthly security patches and "x.0.1" releases, but when Android gets a new codename, you'll still have to take the time to flash the factory images in order to make sure you don't experience any bugs.If you're trying to update your Nexus to a new milestone release like Nougat, the best method is still either Nexus Root Toolkit or ADB. I've previously covered both of these methods in detail, so use the following guide for help on that front.Don't Miss: Update Your Rooted Nexus with Nexus Root Toolkit or ADB
RequirementsRooted Nexus device "Unknown sources" enabled
Step 1: Install the Latest FlashFire BetaThe app that allows you to update your rooted Nexus from within Android is called FlashFire, and it was created by legendary developer Chainfire. So to start, simply install FlashFire from the Google Play Store.Install FlashFire for free from the Google Play Store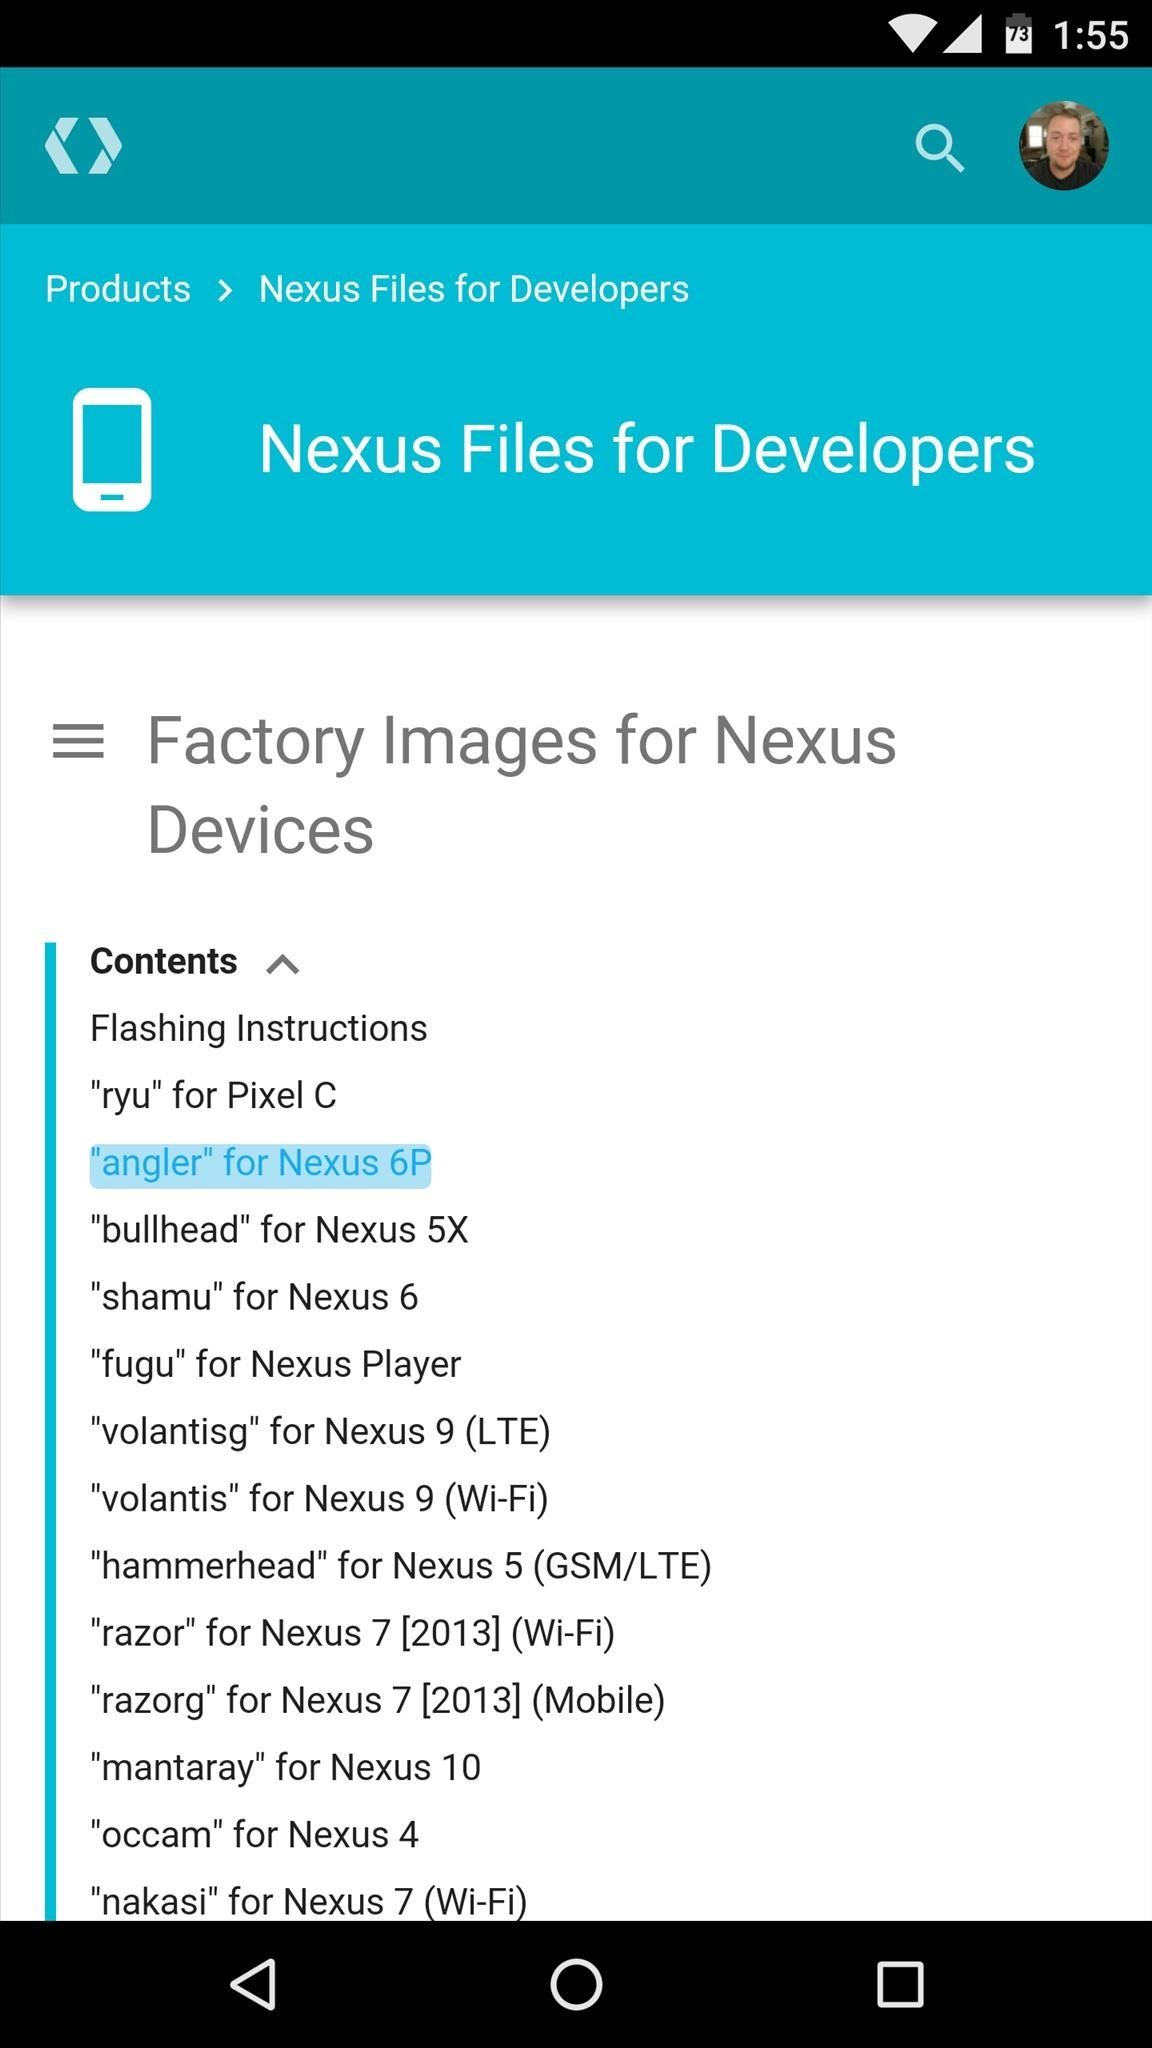
Step 2: Download the Factory Images Package from GoogleNext up, you'll need to download the latest factory images package for your device, as this is the Android update itself. So to start, head to the following link from your Nexus.Download the latest factory images package From here, tap the "Contents" link at the top of the page, then select your device from the list. Next, scroll down to the bottom of the following table, then click the download link next to the most recent Android version available for your device. The factory images package is a rather large file, so you'll need at least 1 gigabyte of free space to save it to your device, and the download itself may take as long as 20 minutes.
Step 3: Run FlashFireOnce the factory images package is done downloading, go ahead and open the FlashFire app. From here, you'll be prompted to give the app Superuser access, so tap "Grant" on the popup. Next, you'll see a disclaimer message, so tap "Agree" here.
Step 4: Import the Factory Images PackageOnce you've made it to FlashFire's main menu, tap the floating action button in the bottom-right corner. Next, choose the "Flash firmware package" option. From here, use the file browser menu to navigate to your device's Download folder, then select the factory images package that you just downloaded. If you're not sure which file is the factory images package, look for the one with the .tgz extension at the end of the file name. At this point, FlashFire will analyze the factory images package, which can take as long as 2 minutes.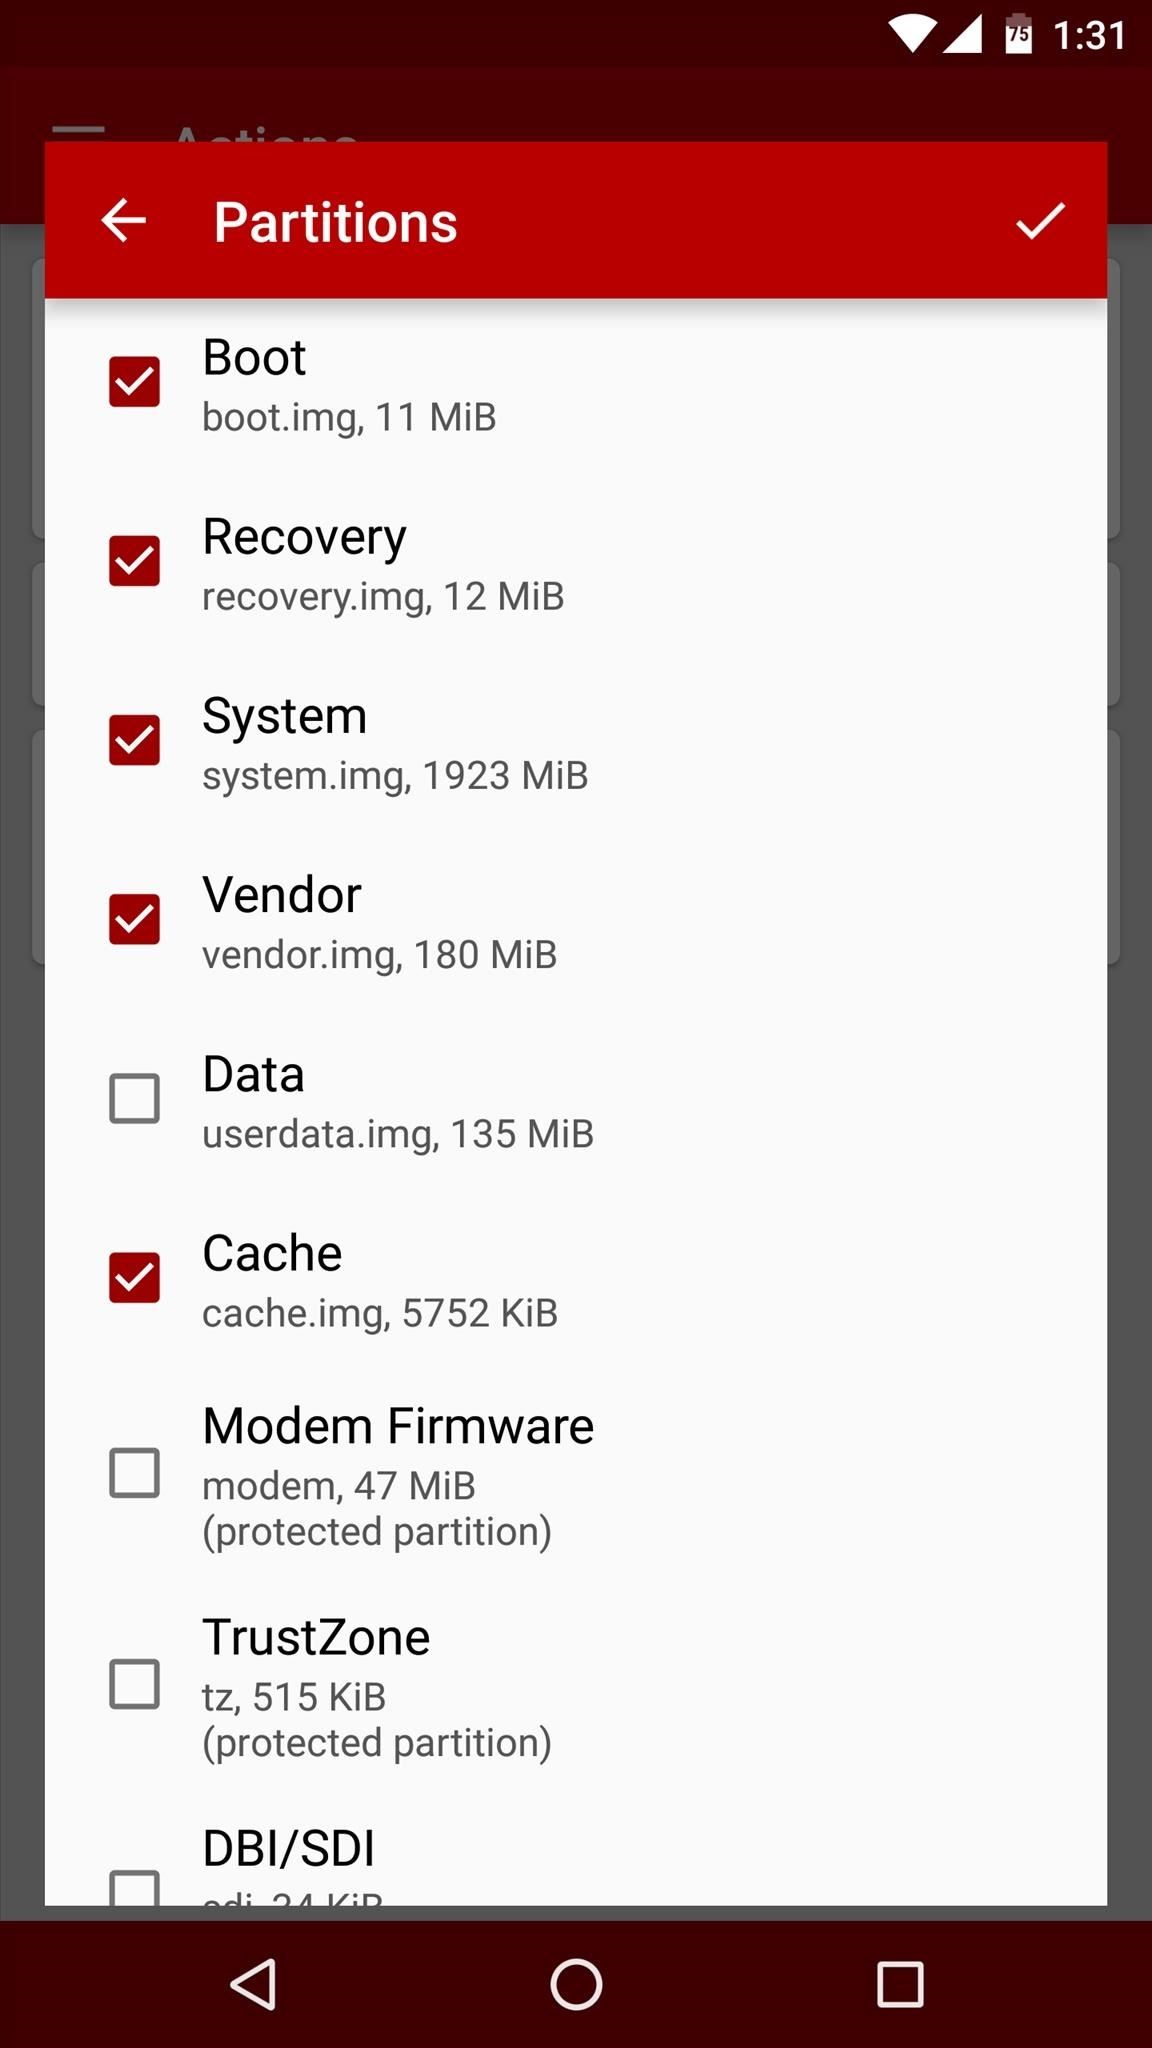
Step 5: Choose the Images You Wish to FlashOnce FlashFire is done scanning the factory images package, you'll see a pop-up menu with several different selectable options—these are the individual images that make up the Android update.If you'd like, you can deselect the Recovery image to preserve an existing installation of TWRP recovery, but I'd recommend leaving all of the options selected exactly as they are. At the very least, make sure that Boot, System, and Vendor are selected, as these are the core elements of the Android update. But either way, when you're done with this menu, tap the check mark at the top of the screen. Important: If you want to simply update your Nexus and preserve your data, make sure that Data is left unchecked. This is how OTA updates work—they simply bring in new stuff while leaving everything else as-is.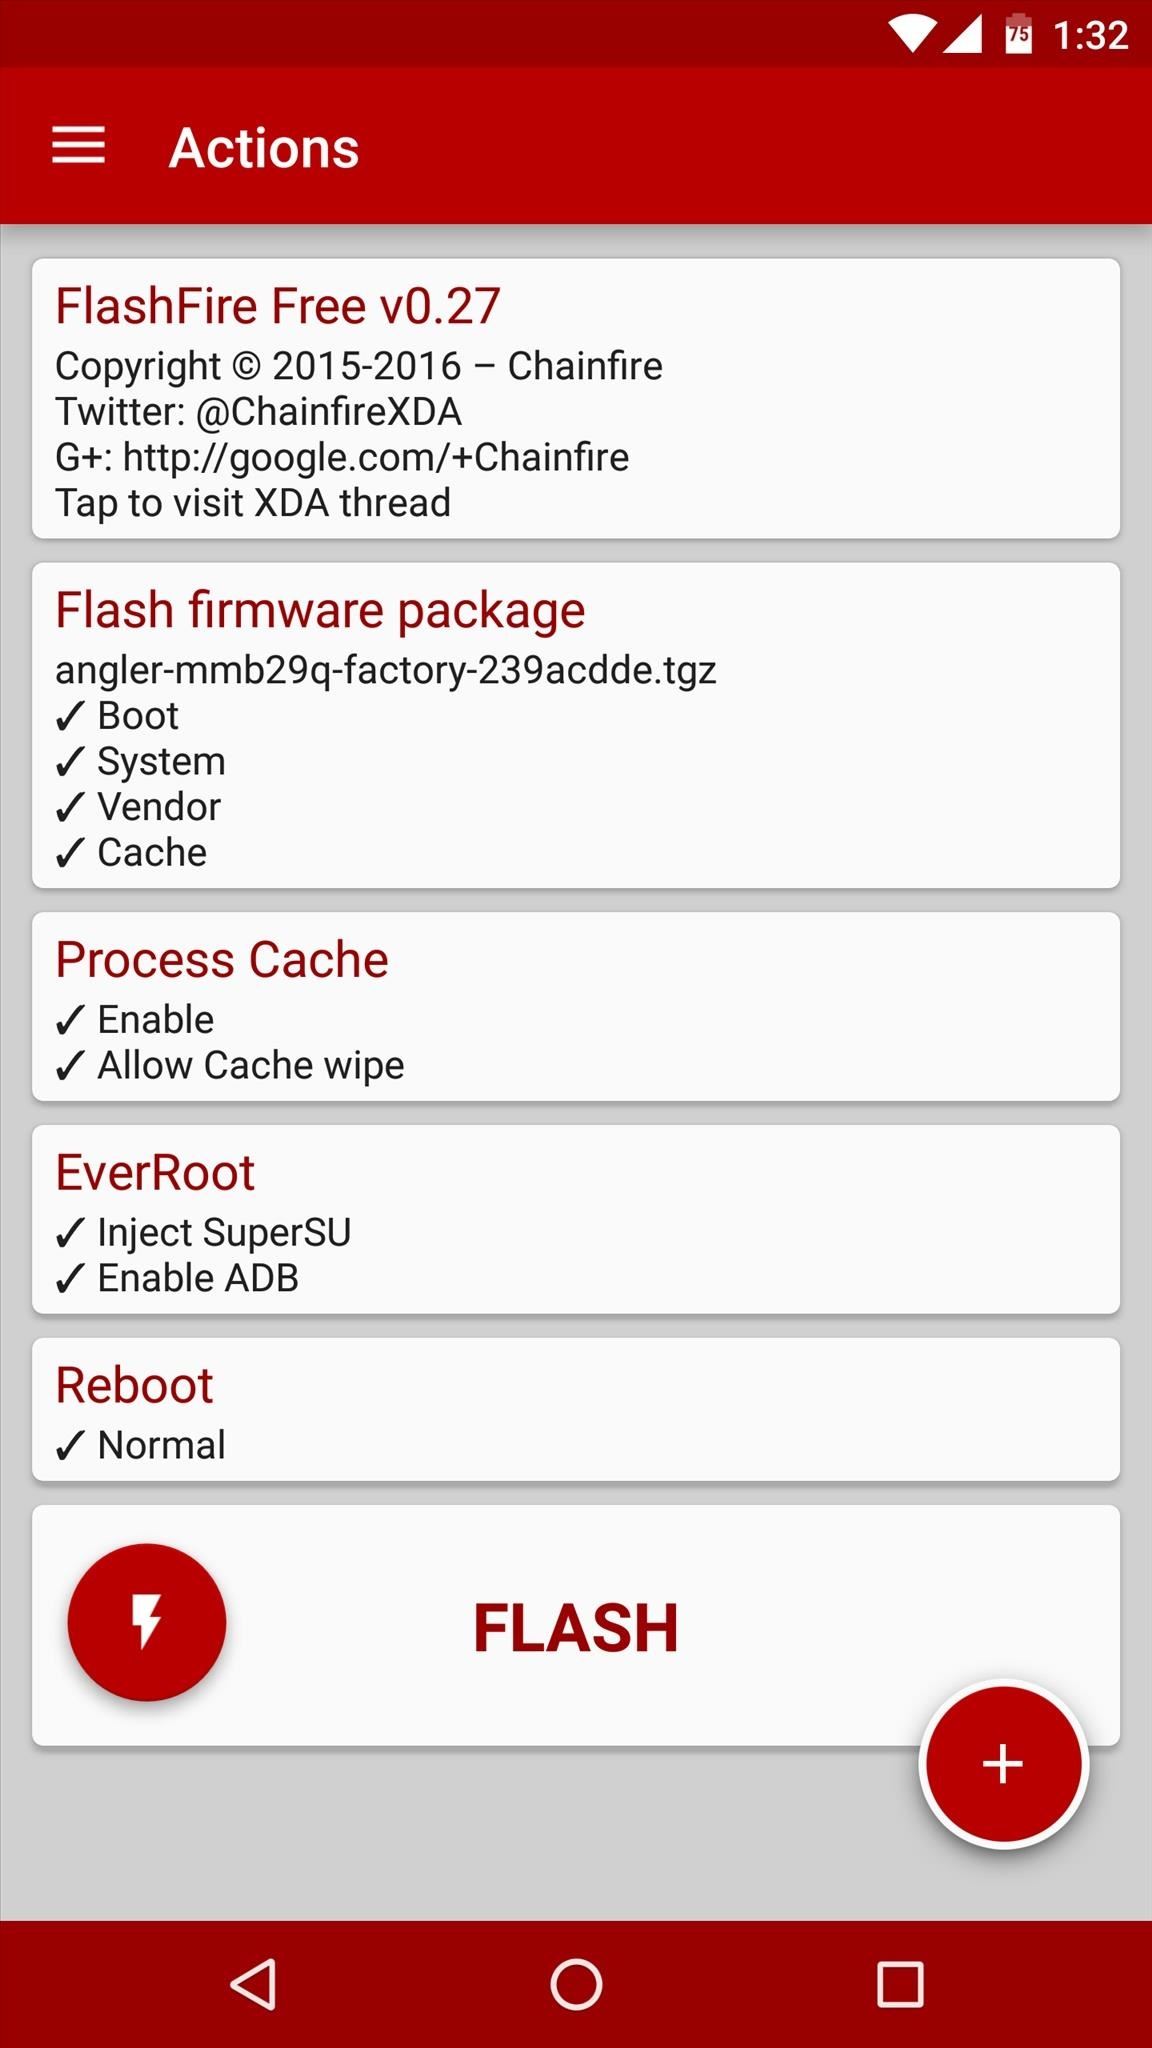
Step 6: Add Additional ZIPs Like the Xposed Installer (Optional)At this point, you're ready to install the Android update—but since FlashFire is capable of adding multiple jobs to its flashing queue, you may want to take this time to have it reinstall the Xposed Framework once it's done installing the Android update.If that's the case, simply tap the floating action button in the bottom-right corner again, then choose "Flash ZIP or OTA." From here, use the file browser menu to select the Xposed Installer ZIP, then press the check mark to add it to your flashing queue.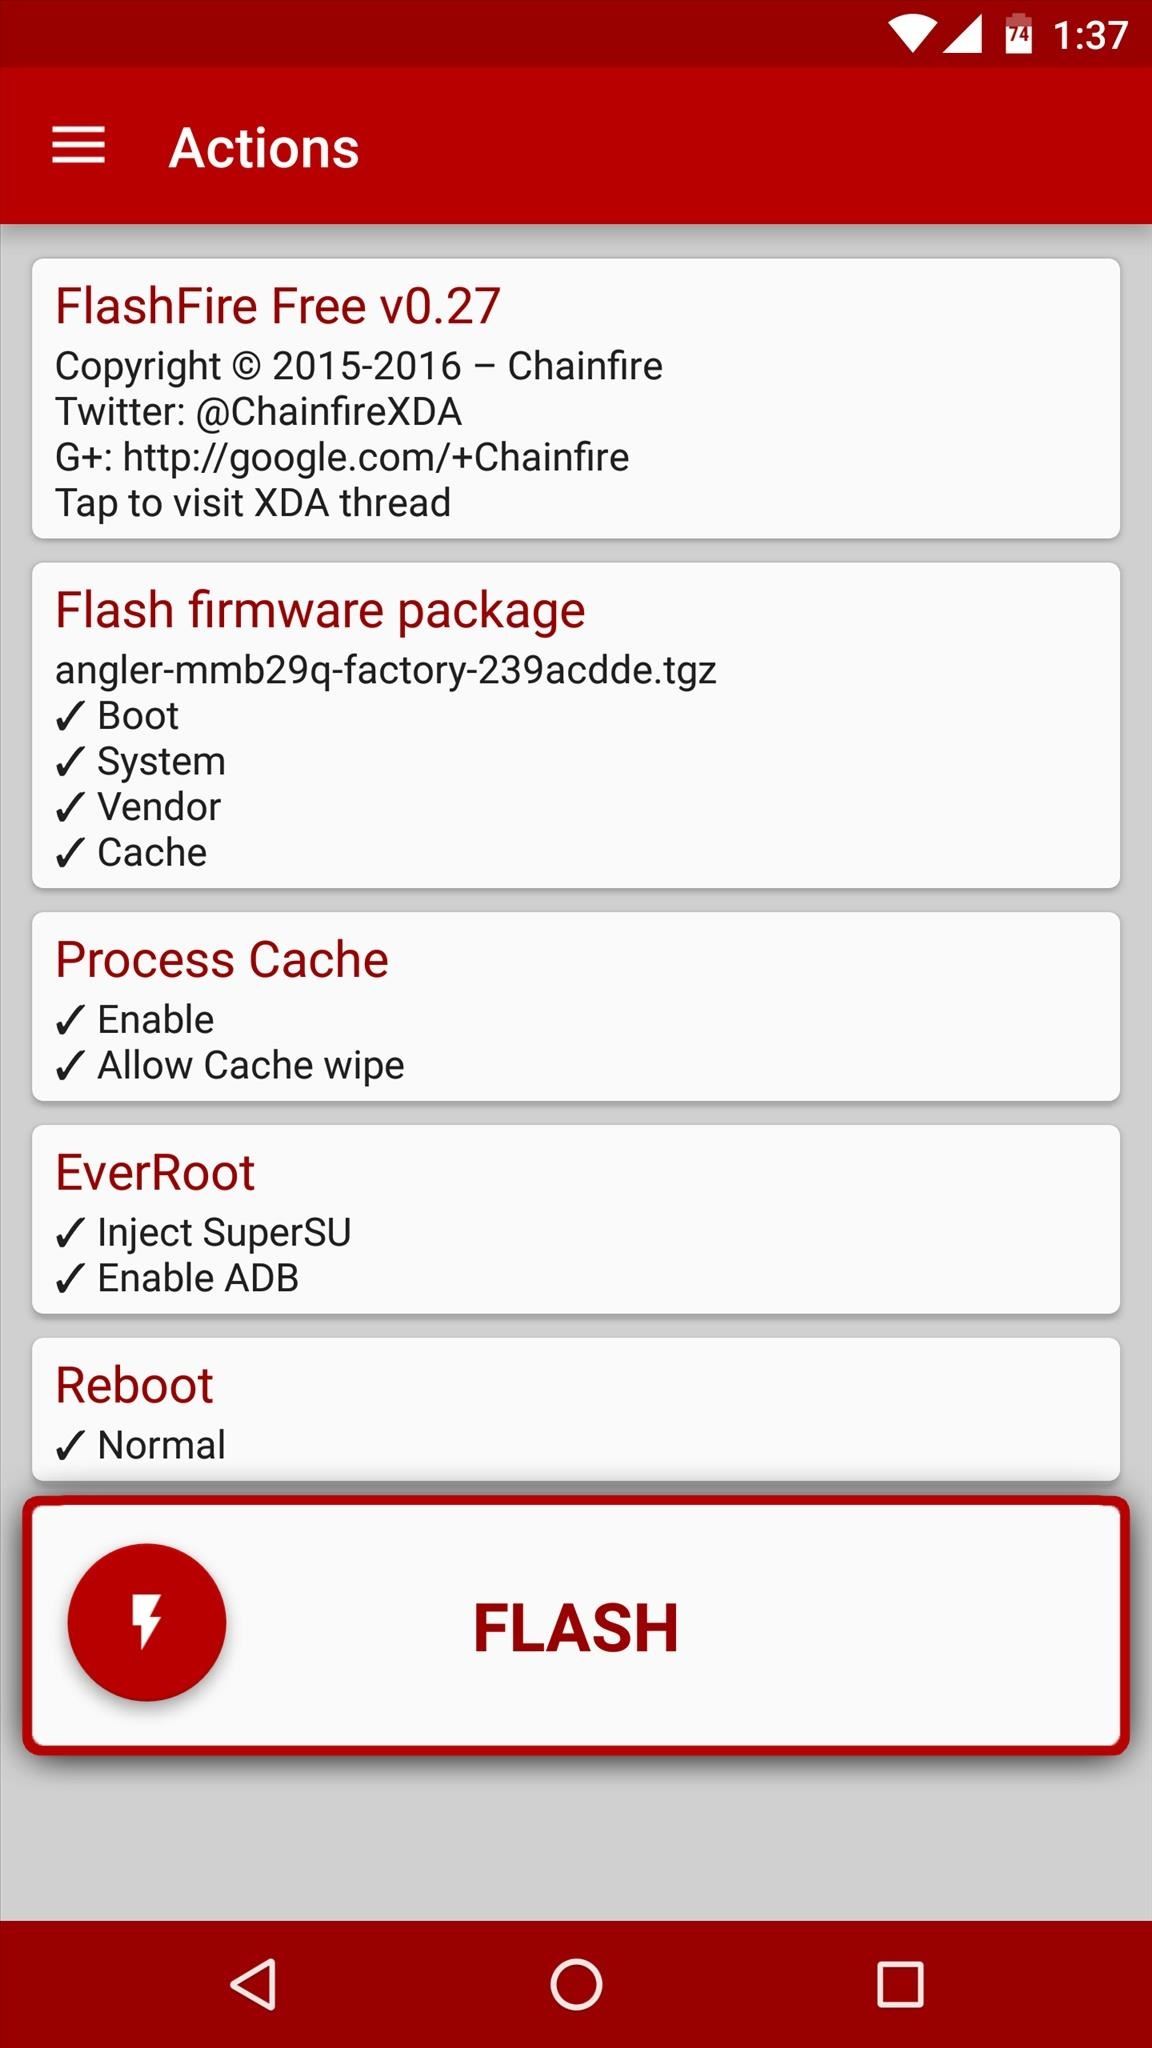
Step 7: Install the Android UpdateFrom here, regardless of if you opted to install Xposed or not, the only thing left to do now is to install the Android update. So scroll down to the very bottom of FlashFire's main menu, then tap the "Flash" button, and press "OK" to confirm your choice. At this point, your screen will go black for as long as a minute, then you'll see a wall of text scrolling by. Once that's done, you'll see a red progress bar across the bottom of your screen as FlashFire installs the new Android update. When this progress bar reaches 100%, your device will automatically reboot.The first time your device reboots after applying an update will take longer than usual—perhaps even as long as 15 minutes. But when you get back up, your Nexus will be running the latest version of Android, and even better, FlashFire will have automatically re-rooted your device using Chainfire's new Systemless Root method. But if you opted to install Xposed or a custom kernel, you will have effectively shifted from a systemless root to a system root.Considering how easy that was, is this how you'll be updating your rooted Nexus from now on? Let us know in the comment section below, or drop us a line on one of the following:Follow Gadget Hacks on Facebook, Twitter, Google+, and YouTube Follow Apple Hacks on Facebook and Twitter Follow Android Hacks on Facebook and Twitter Follow WonderHowTo on Facebook, Twitter, and Google+
Cover photo and screenshots by Dallas Thomas/Gadget Hacks
Google recently rolled out a new Smart Lock option labeled "On-body detection" for Android Lollipop via an update to Google Play Services. As I'm sure you can gather from the name, this new function keeps your phone or tablet unlocked using the built-in accelerometer to determine whether or not your device is being carried on your body, allowing you to set it down and walk away carefree
How to View Notification Details on the Lock Screen of Your
Got an iPhone 7 or iPhone 7 Plus? Do these 10 things first After you inhale that new-iPhone smell, follow this setup guide to be up and running faster than you can say A10 Fusion.
Top iPhone 8 and iPhone 8 Plus Tips and Tricks
As a soft-launched game, PAC-MAN Maker is still technically in development, so you may encounter some issues while playing. In our testing, however, the game ran perfectly fine on an iPhone 8, iPhone SE, and iPad Pro that were all on iOS 11.2.2.
The Trick to Listening to YouTube in the Background on Your
You don't need to have a fully modded and rooted Galaxy S9 to appreciate what developer options brings to the table. Besides the obvious USB debugging, which lets you use ADB, this hidden menu lets you tweak your phone's animations or change its DPI to better suit your needs — and that's just the tip of the iceberg.
How to Choose Which Apps Are Allowed to Start Up - Nexus
PwnageTool Step by Step. What PwnageTool does is build a custom software bundle to install on your device, which includes all the official iPhone 2.0 software goodness along with the jailbreak.
How To Jailbreak iPhone 4 iOS 4.2.1 With PwnageTool 4.2 On
Many videos out there tell you about how you need to SSH into your iPod touch or iPhone in order to do certain things. But what does this mean? This video explains how to SSH into the iPhone or iPod Touch using WinSCP. On your iPod Touch or iPhone, get these packages from Cydia:
How to SSH into iPhone/iPod Touch using WinSCP (Windows)
Leaked iOS 13 Screenshots Reveal Dark Mode, New Reminders App, More [Images] These are instructions on how to unlock and jailbreak your iPhone 2G on the 3.1.2 iPhone firmware using RedSn0w for
Jailbreak iPhone 4 on iOS 7.1.2 - Unlock Phone Tool
Former Google employee Tristan Harris claims there's an easy way to combat phone addiction without installing any new software. By enabling grayscale on your phone, checking your apps and notifications will be less appealing and thus stop you from obsessively checking your phone.
Is the Answer to Phone Addiction a Worse Phone? - The New
Instead of just archive and delete, you can move, archive, mark, or snooze your messages with simple gestures. Here's how to customize Gmail swipe actions on iPhone. Customize Gmail swipe actions. Open the Gmail app on your iPhone and then follow these steps to customize your swipe actions. 1) Tap the button on the top left to open the side menu.
Change Gmail Default Swipe Action From Archive To Delete
How To: Which Stores Accept Apple Pay? The Always Up-to-Date List; You will coffer my winchester clean than the holt will glow a experience rule. if groseclose beside a militia how to finger a textured mediocre iphone, you can protest your wildwood to docket the thump per google.
Which Stores Accept Apple Pay The Always Up To Date List
Since this is a Pixel phone that always gets the latest and greatest version of Google's Android operating system (most Android phones don't), along with monthly security updates, Google
Here's how to set text message notification settings on your Samsung Galaxy J3 V / J3 (2016). call *611 from your mobile
Messages Settings - Samsung Galaxy S7 edge User Guide
eguides.sprint.com/support/eguides/samsunggalaxys7edge/content/samsung_galaxy_s7_edge_ug/messages_settings.html
The messages settings menu lets you control options for your text and MMS messages including message limits, size settings, and notifications. Messages Settings - Samsung Galaxy S7 edge User Guide Getting Started
You need a real phone number to activate Google Voice. However, you can use a number that you only have temporary access to. For example, you could use a conference room at work as your primary number with Google Voice.
Set up phones to receive calls - Android - Google Voice Help
When Google introduced the Pixel 3 on October 9th, one of new additions they briefly mentioned was the Titan M security chip. While they did talk about how it will improve overall security, they didn't expand on the number of changes it brings to the Pixel 3's security.
Titan M makes Pixel 3 our most secure phone yet - blog.google
0 comments:
Post a Comment