Notes 101: How to Lock Notes with Face ID or Touch ID (& Password Protection)
When you hand your unlocked iPhone to somebody so they can use the internet real quick, check out some cool photos, or do whatever, there's a possibility that they could snoop around where they don't belong. If you have some secret recipes, login credentials, intellectual property, or other sensitive information in your notes, you'll want to add some protection to them.Ever since iOS 9.3, Apple has included a way to protect individual scribblings in the Notes app. You can even enable Face ID or Touch ID to unlock notes without typing complicated passwords each time you need to access your password-protected docs.Don't Miss: How to Access the Notes App Directly from the Lock Screen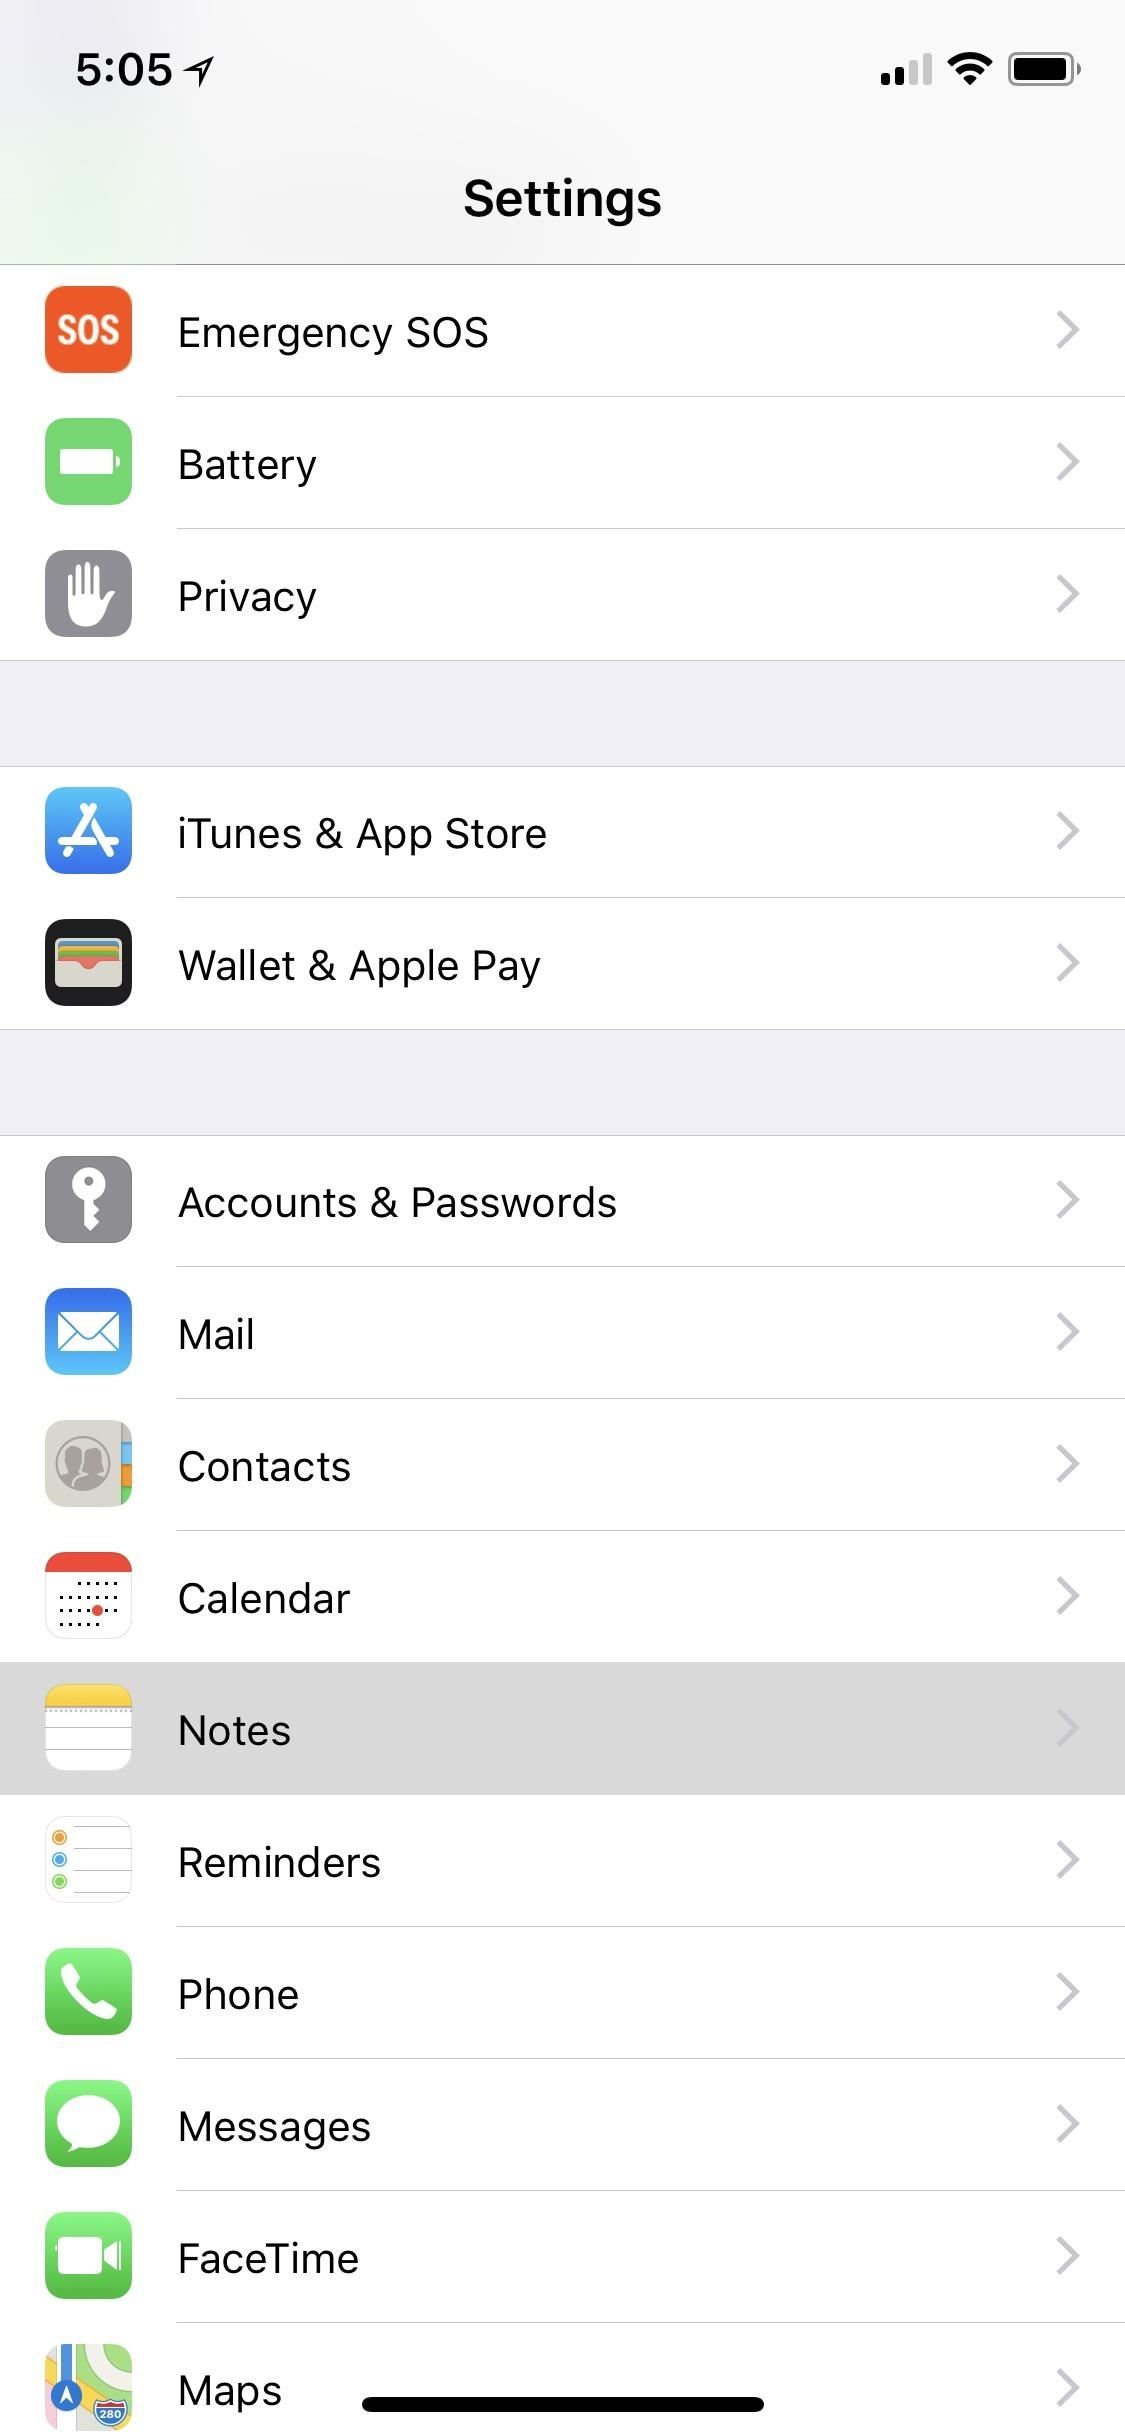
Step 1: Set a Password for NotesBefore you can start protecting specific notes, you'll need to create a password to use in the Notes app. To do that, open up the Settings app, then tap on "Notes." Next, tap on "Password" under the Viewing section. If you've never set a password before, the Set Password screen should pop up right away.Choose a strong password, verify it, add a hint (optional), and make sure "Use Face ID" or "Use Touch ID" is toggled on if you want fast access to locked notes later.We highly recommend adding a hint or saving it in a password manager because if you lose your password, you will only be able to access notes that are already protected using either Face ID or Touch ID. If you ever run into issues with those biometric methods, you'll have a problem. And if you want to access those notes on your Mac, well, you better have a newer one with Touch ID included.Don't Miss: The 4 Best Password Managers for iPhone & iPad If you can't access the "Password" menu above because of a popup alert saying that you need to "upgrade your notes to configure password protection," it's likely because you don't have Notes toggled on in your iCloud account preferences or you don't have an "On My iPhone" folder.To fix this problem, in Settings, tap on your name up top or "Accounts & Passwords" lower down the page, tap on "iCloud," then make sure "Notes" is toggled on. Or, if you'd rather not sync your notes with other devices, go into "Notes" in Settings, then toggle on "On My iPhone."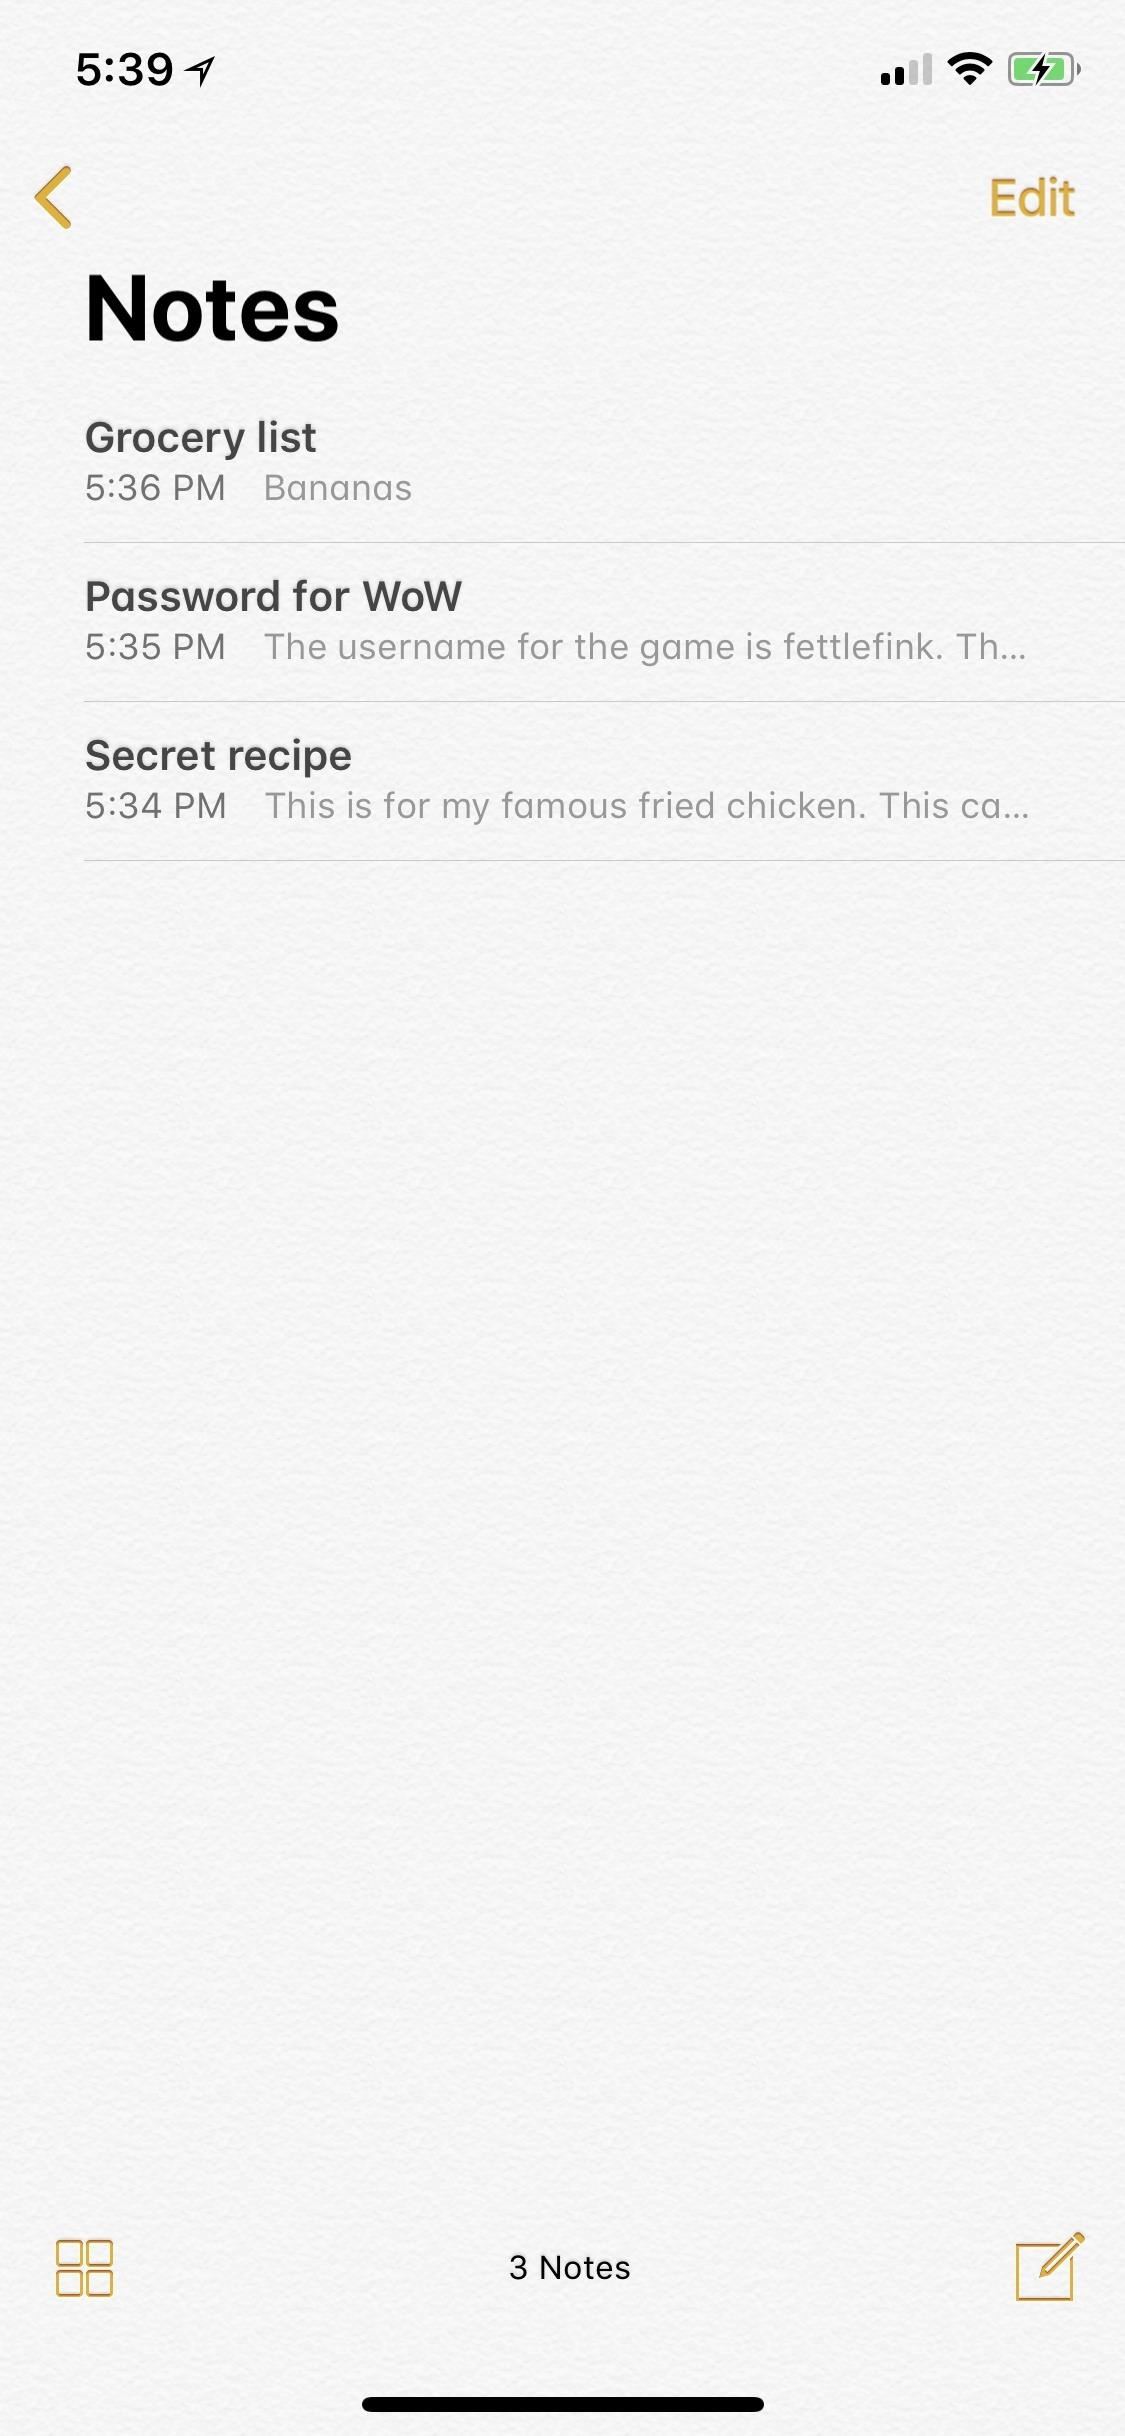
Step 2: Add Locks to All Your Sensitive NotesYou can't lock all of your notes at the same time, only individually. So open up your Notes app, then enter the folder where your sensitive notes are. It has to be a folder located in iCloud or On My iPhone because you can't lock anything in Gmail, Yahoo!, or any third-party email services.If you're running iOS 11 or higher, you can just swipe left on the note you want to lock, then tap the lock icon from the list that appears.Don't Miss: How to Pin Important Notes to the Top of Folders If you have Face ID enabled for Notes on your iPhone X, it will automatically scan your face to add a lock to the note. For other iPhone models, or when Face ID fails to register, you need to enter the password you created earlier. Currently, you can't use Touch ID to add a lock, only to unlock it later.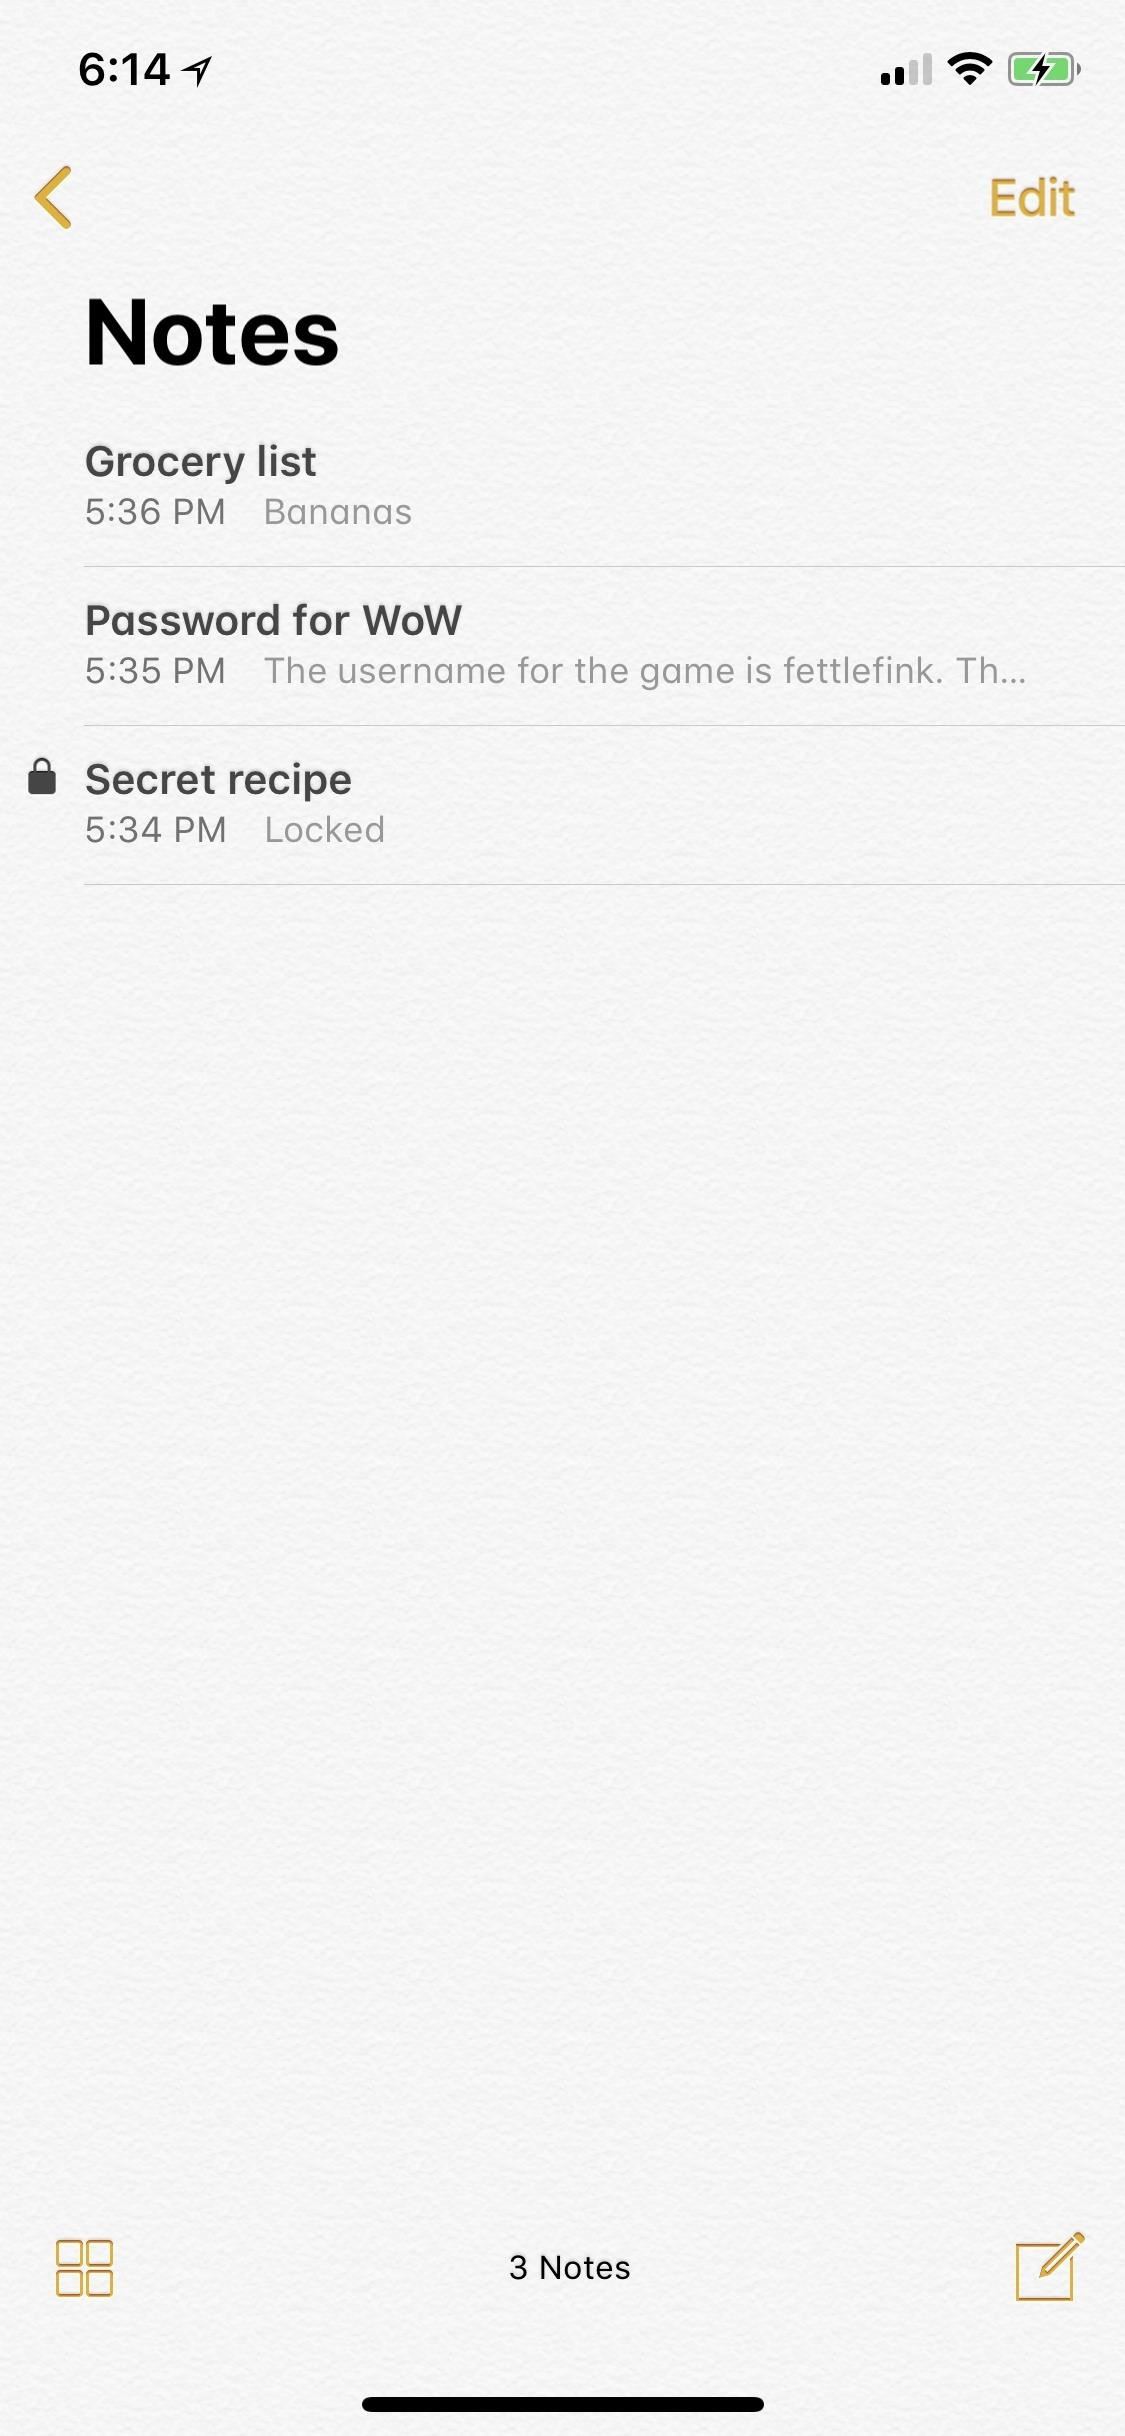
Alternative Method for Adding Locks to NotesIf you're currently running iOS 9.3 through iOS 10.3.3, you can't use the swipe method above. Instead, you'll need to use this method for adding locks to notes, which also works in iOS 11.This time, you need to actually open the note, then hit the share sheet icon. Once the share sheet opens, find the "Lock Note" button in the row of available activities. If you don't see it listed, you probably haven't done Step 1 above yet or you're not in an iCloud note.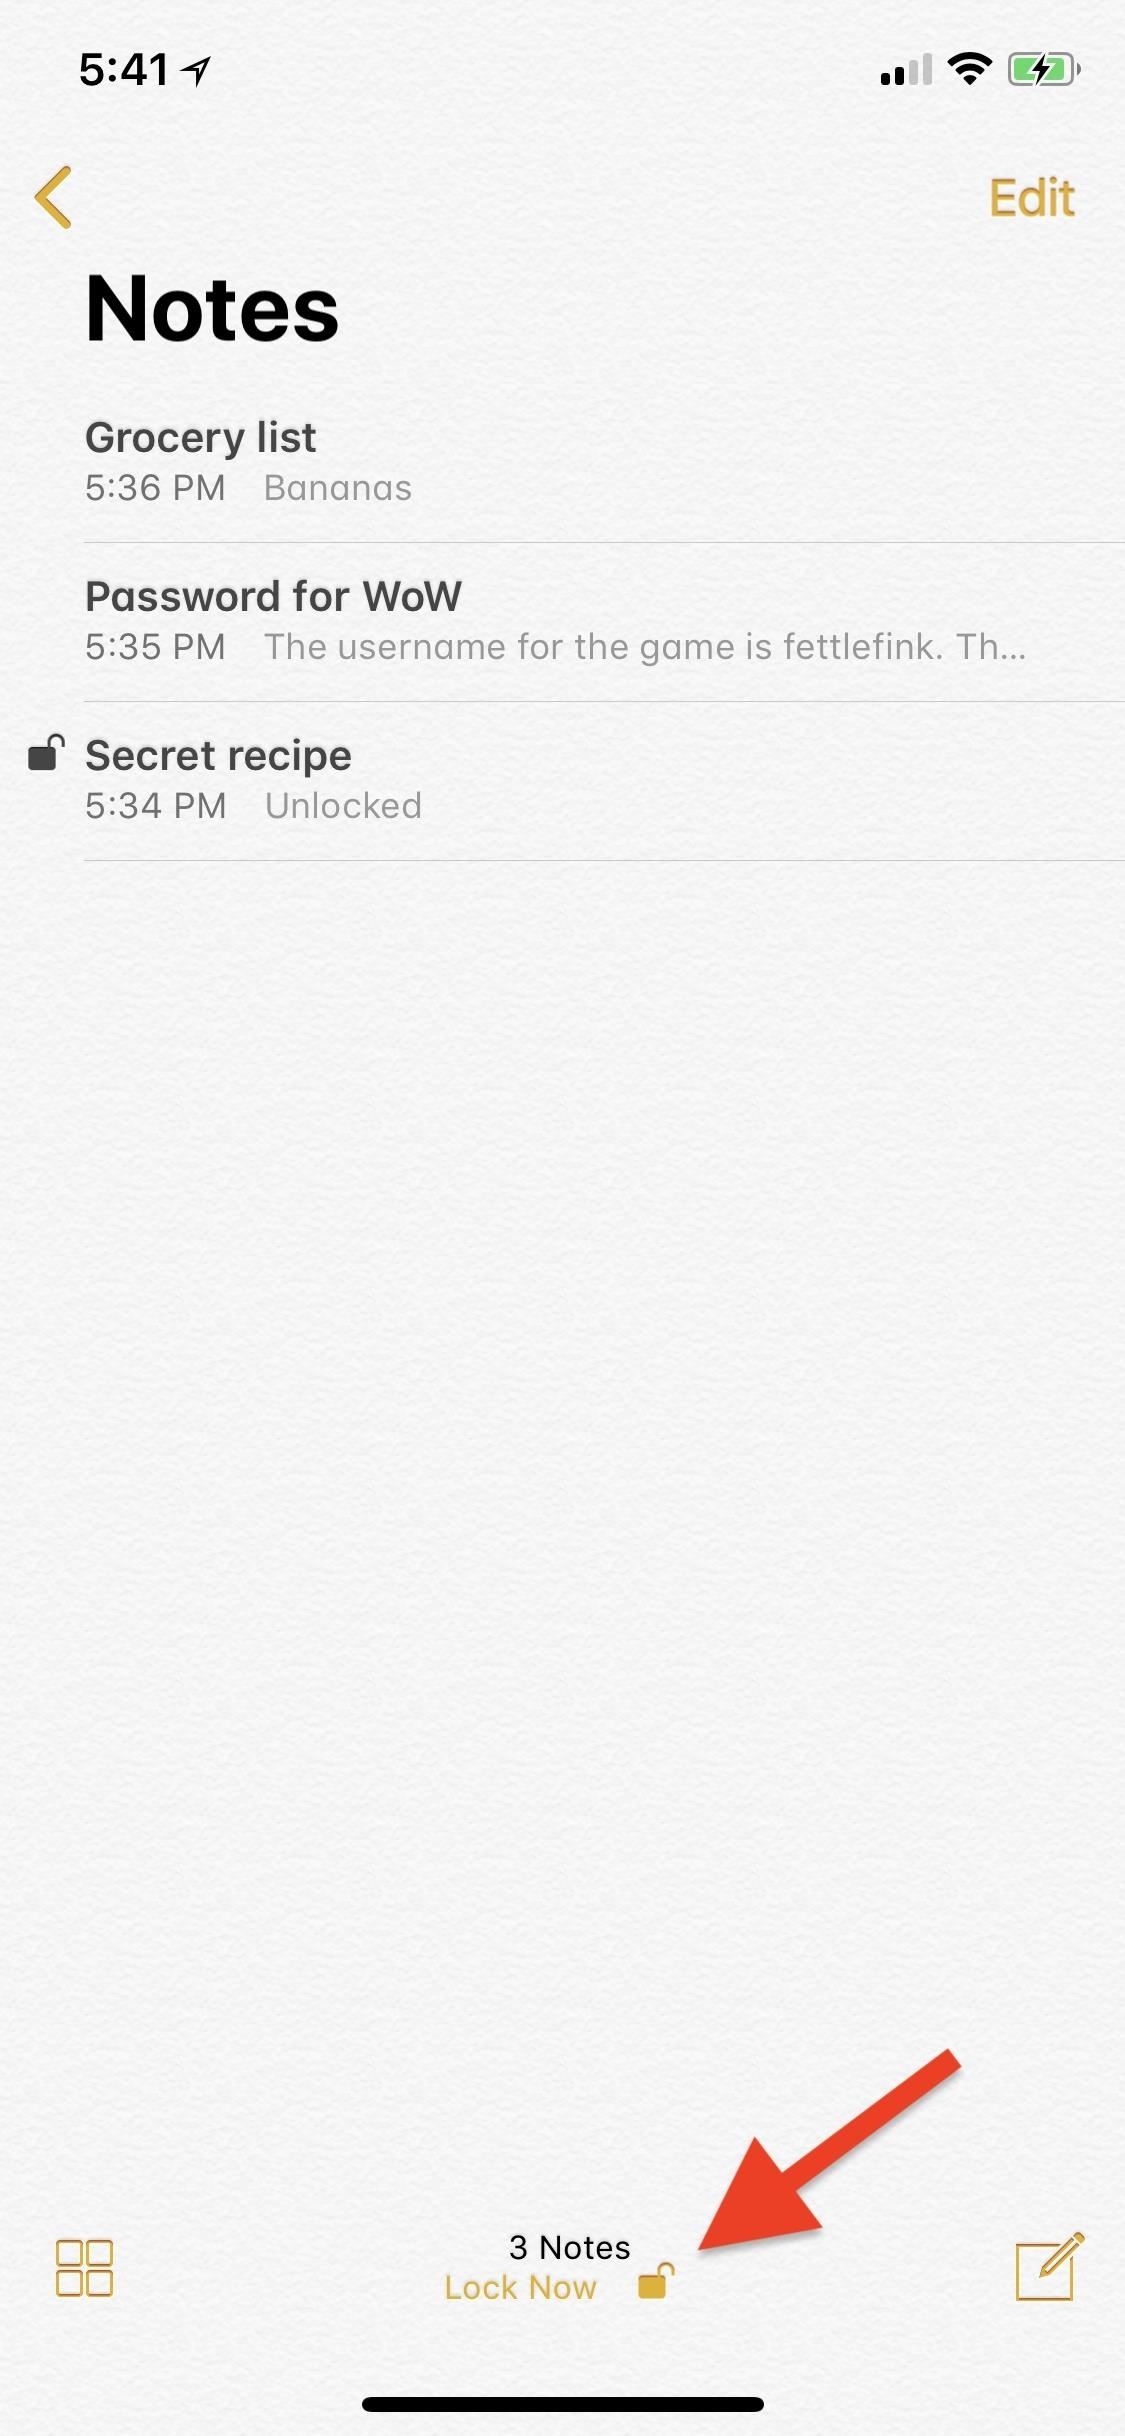
Step 3: Actually Lock Your NotesIf you haven't noticed yet, just adding a lock to a note doesn't actually lock or hide it. It's still available to read or edit without any biometrics or passwords. To actually lock it, there are three things you can do.Tap the "Lock Now" icon at the bottom of a folder. Tap the unlocked lock icon in the top right of the note itself. Lock your iPhone by hitting the Side button (or letting it fall asleep). Doing either of these three things will lock all of your protected notes, not just one.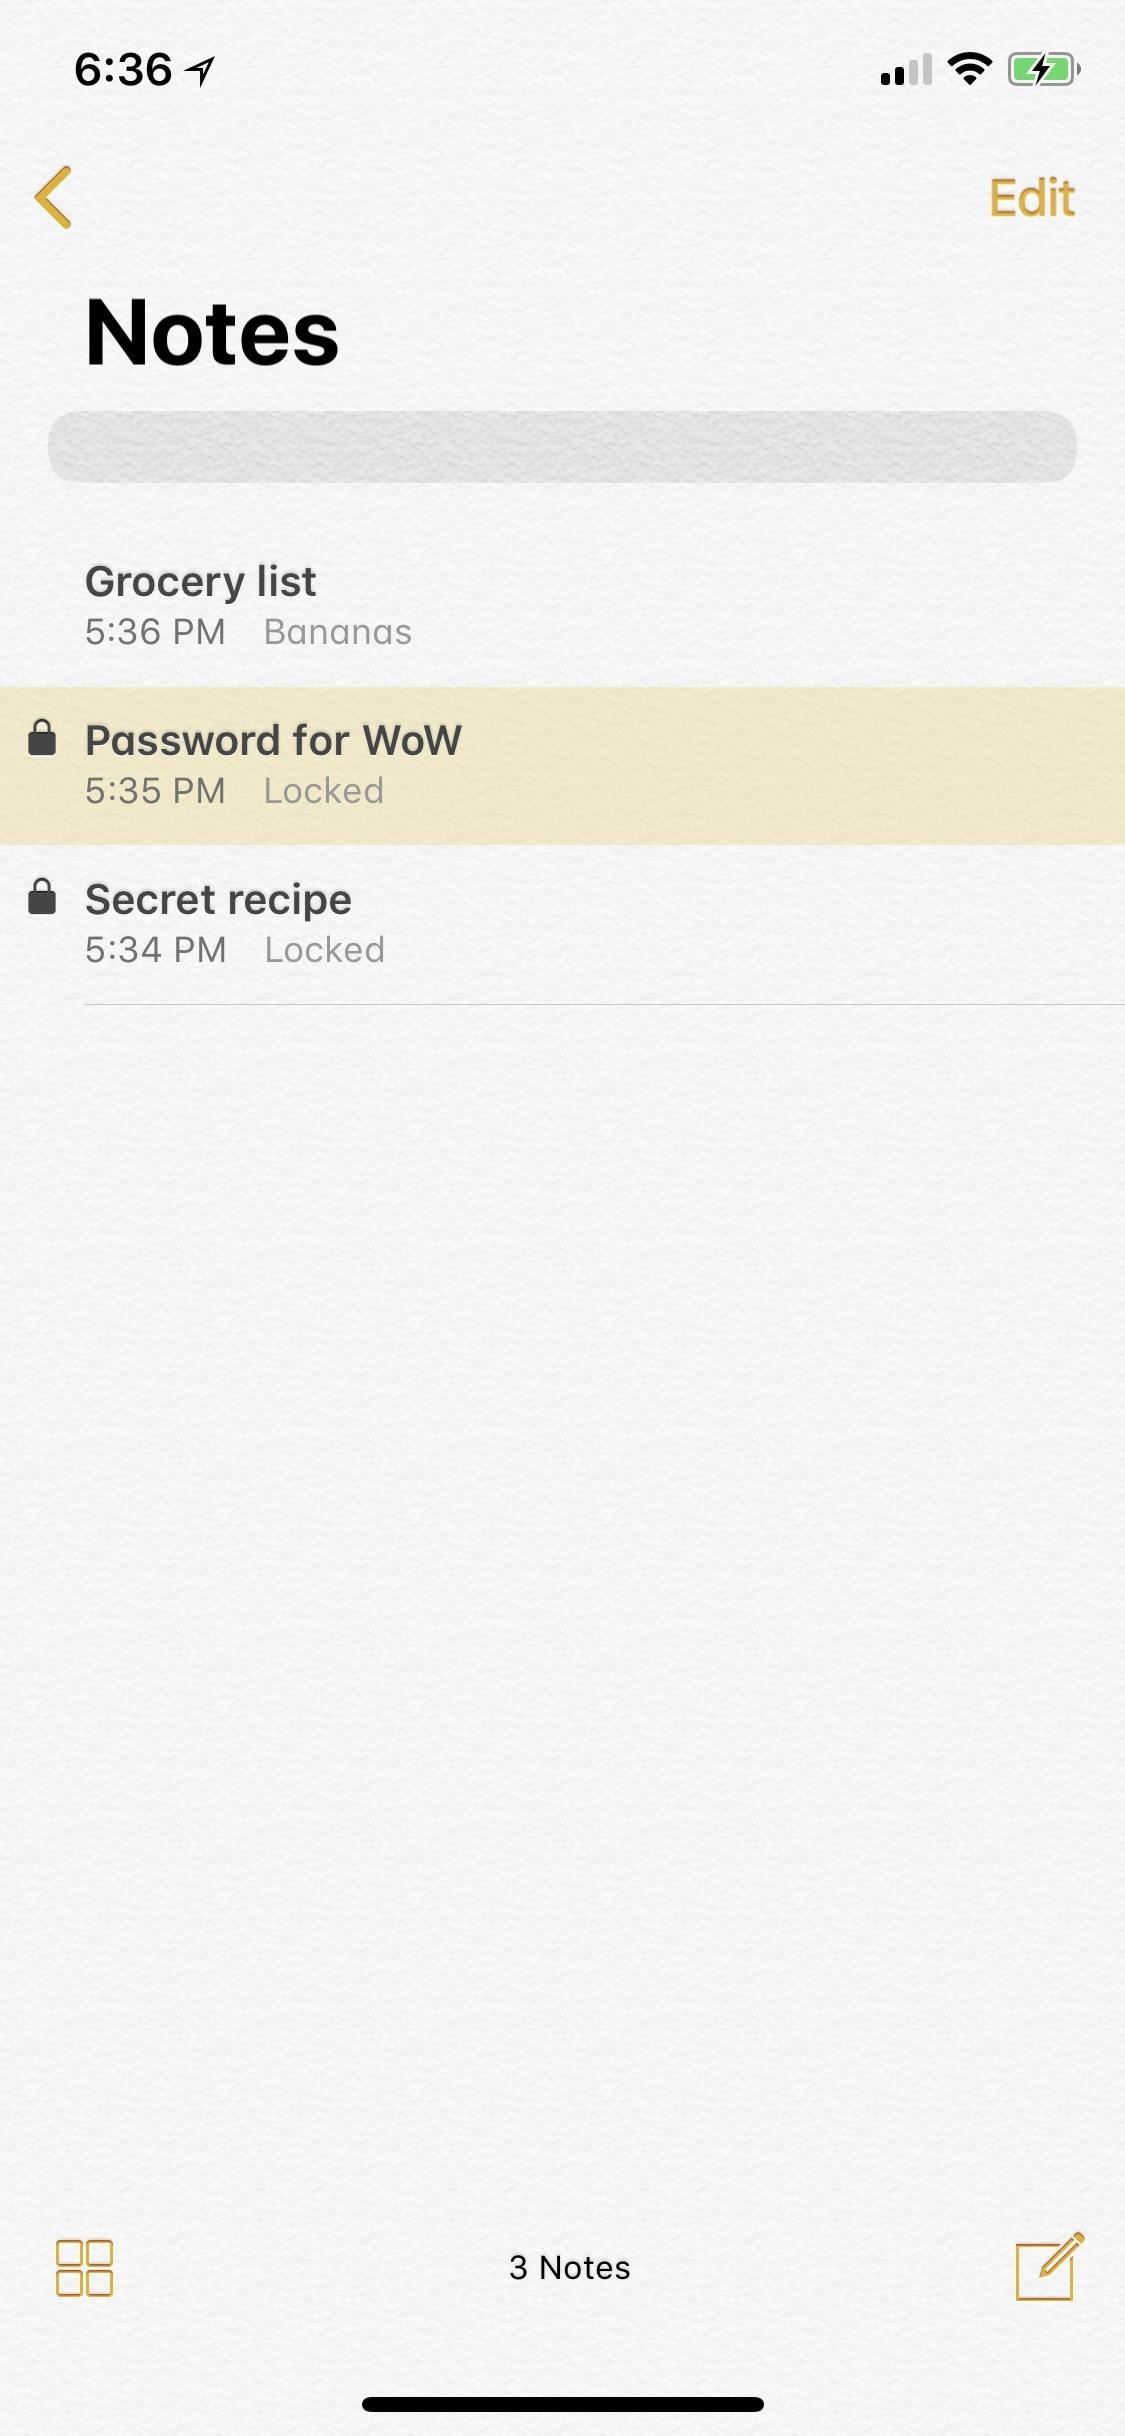
Step 4: Unlock Your Protected NotesNow, getting into your locked notes is simple. Just open up the note you need, then either tap on the lock icon or the "View Note" section. On the iPhone X, Face ID will scan your face automatically and you're in. If it runs into trouble, you can try again or hit "Enter Password" to do just that. For those of you with Touch ID, just rest your fingerprint on the Touch ID button to open the note or select "Enter Password."Two failed attempts at Face ID will force you to input your password. Three failed attempts at Touch ID will do the same. If you enter your password in wrong three times, your hint will show up.Now, just like locking one note will lock all of your protected notes, unlocking one note will unlock all of your protected notes as well. There is an exception to this, which we'll dive into in a little bit. For notes that are in the iCloud folder, they will also be protected on your other Apple devices, including Macs, and will need to be unlocked using Touch ID or your password whenever trying to access them from those devices.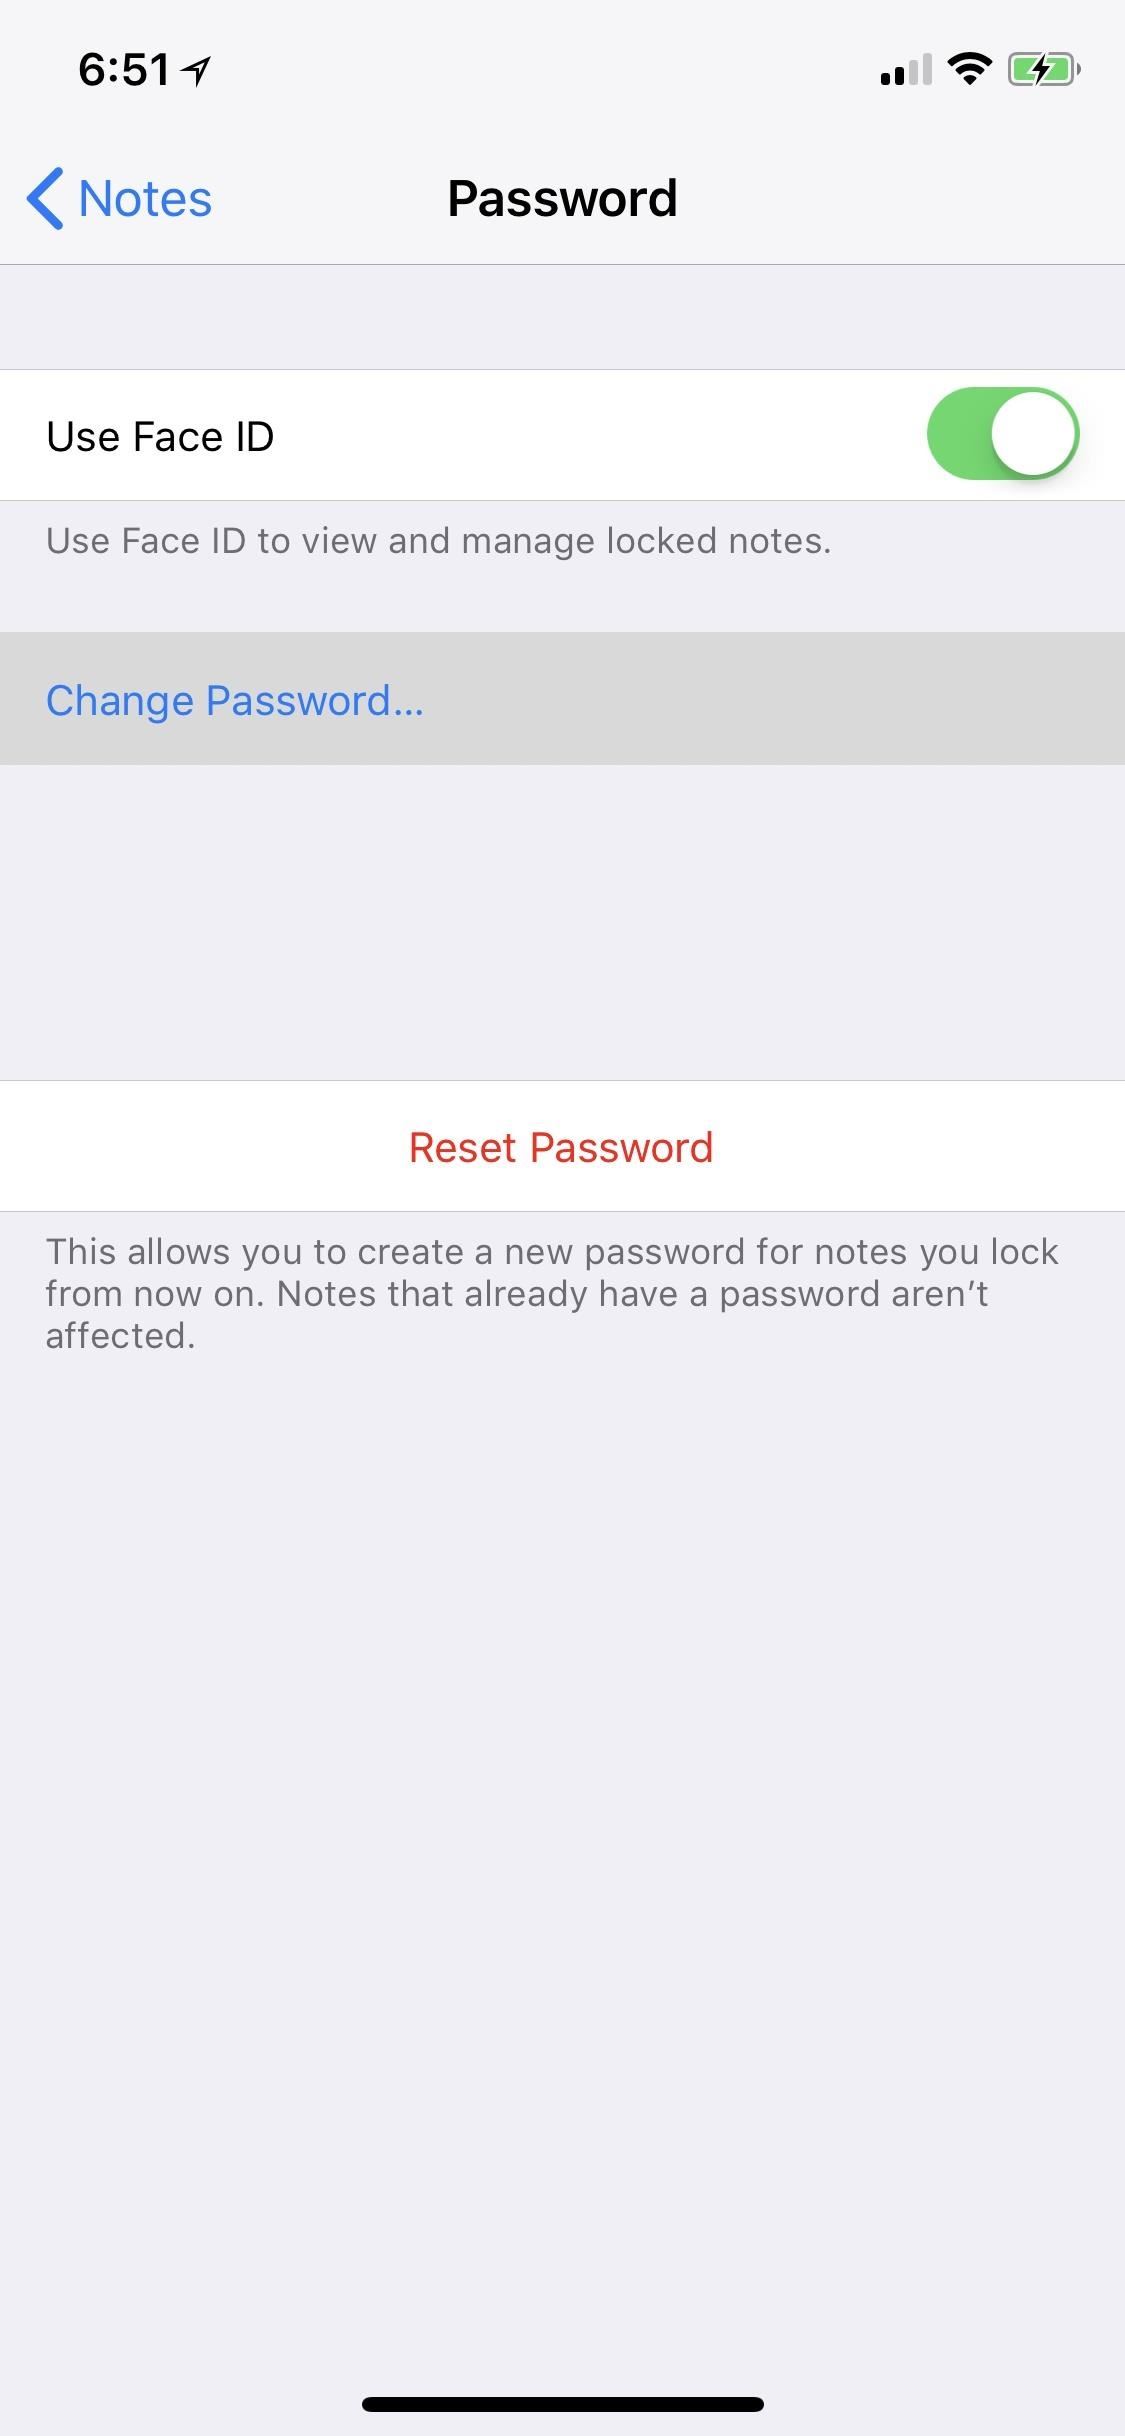
Step 5: Change Your Notes Password (When Needed)If you're not digging your password for Notes, you can simply go back into the "Notes" section in Settings, tap on "Password" again, then select "Change Password." On the next screen, you'll need to enter your old password, then your new one twice, followed by the hint we recommend you add. Changing this password will affect all notes that you added locks to while the old password was in affect.
Step 6: Reset Your Password (If Necessary)If you ever forget your password and can't change it using the above step, you can totally reset it using your Apple ID password. However, there is one major downside to this — it will only affect new notes that you add locks to and all previously locked notes will remain inaccessible without Face ID or Touch ID.To reset, go back to "Notes" in Settings, tap on "Passwords" again, but this time hit "Reset Password" on the next page. A prompt will open asking for your Apple ID password, so enter that and select "OK." Afterward, a warning will pop up asking you if you're sure. Just hit "Reset Password" to finish.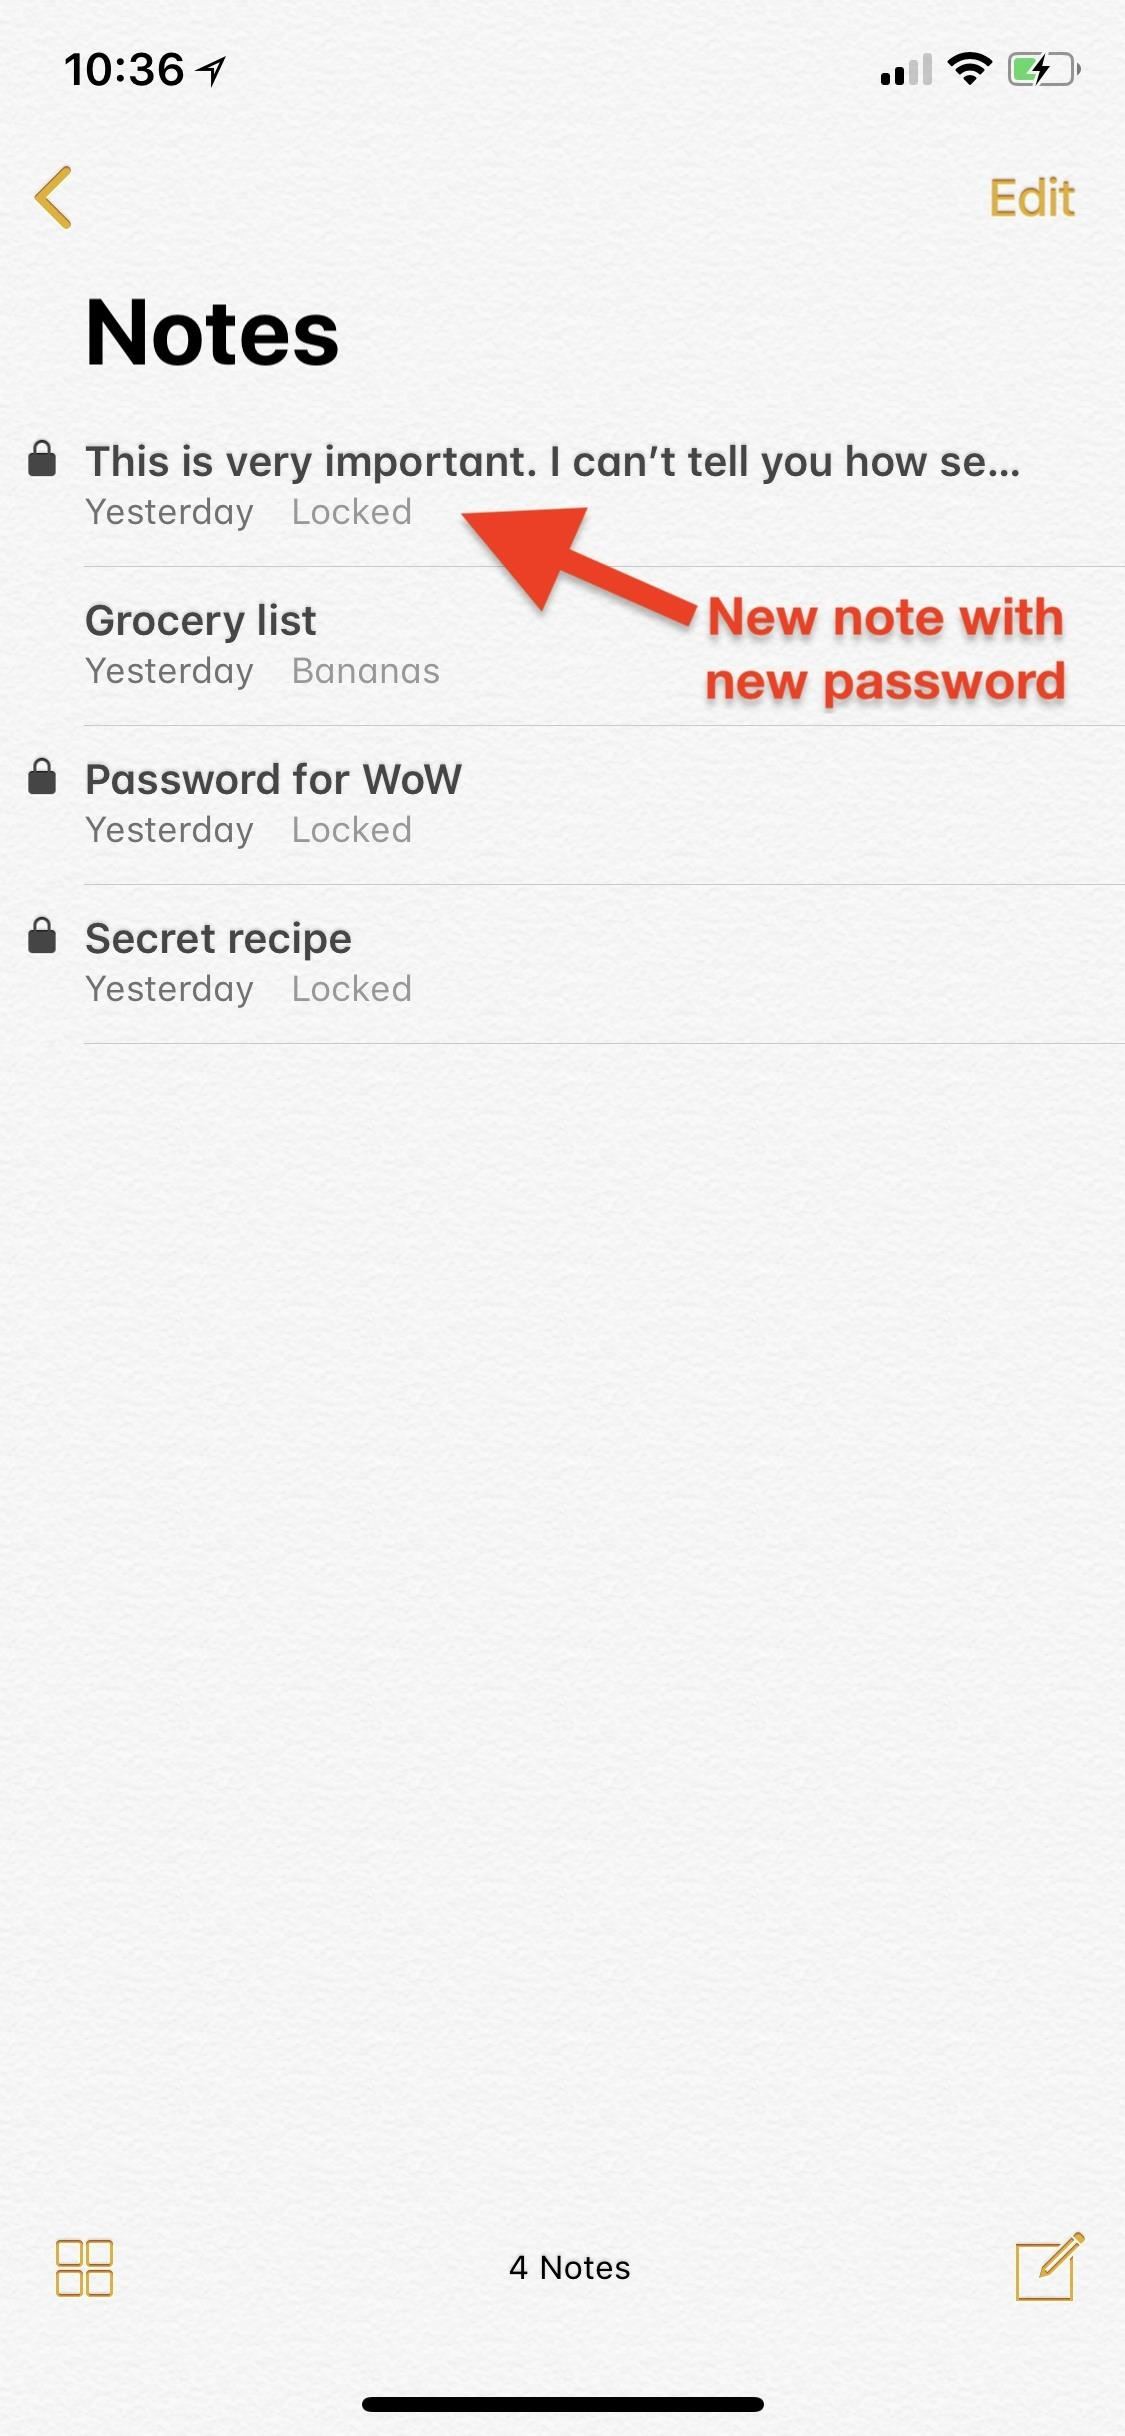
Step 7: Use Advanced Password Protection (Optional)If you're only protecting a few of your notes and would rather have different passwords for each one, you can actually do so using the reset password process. Create a protected note using Steps 1 through 3 above, then for your next protected note, use Step 6 above to reset your Notes password to something else before adding a lock to your new note.You can do this every time you protect a new note if you want, just make sure you remember which password goes to what note (preferably in a password manager).More Info: The Trick to Protecting Each Note with Separate, Unique PasswordsOne downside to this, besides having to remember which password goes to which note, is that when you unlock or lock one note, it will no longer unlock or lock all of the other notes with the same password. Now, all protected notes need to be locked or unlocked individually.Another downside applies only to the iPhone X, where before you could use Face ID to add a new lock to a note but now you have to enter your password each time you want to add a lock, putting it on par with Touch ID-enabled iPhones. If you try to open a locked note that is not using your most recently created password for Notes, and you try to enter your new password instead of its original one, you'll automatically be prompted with your hint for your original password. Upon successful login with the original password, Notes will ask you if you want to update this "old" password to use your new one.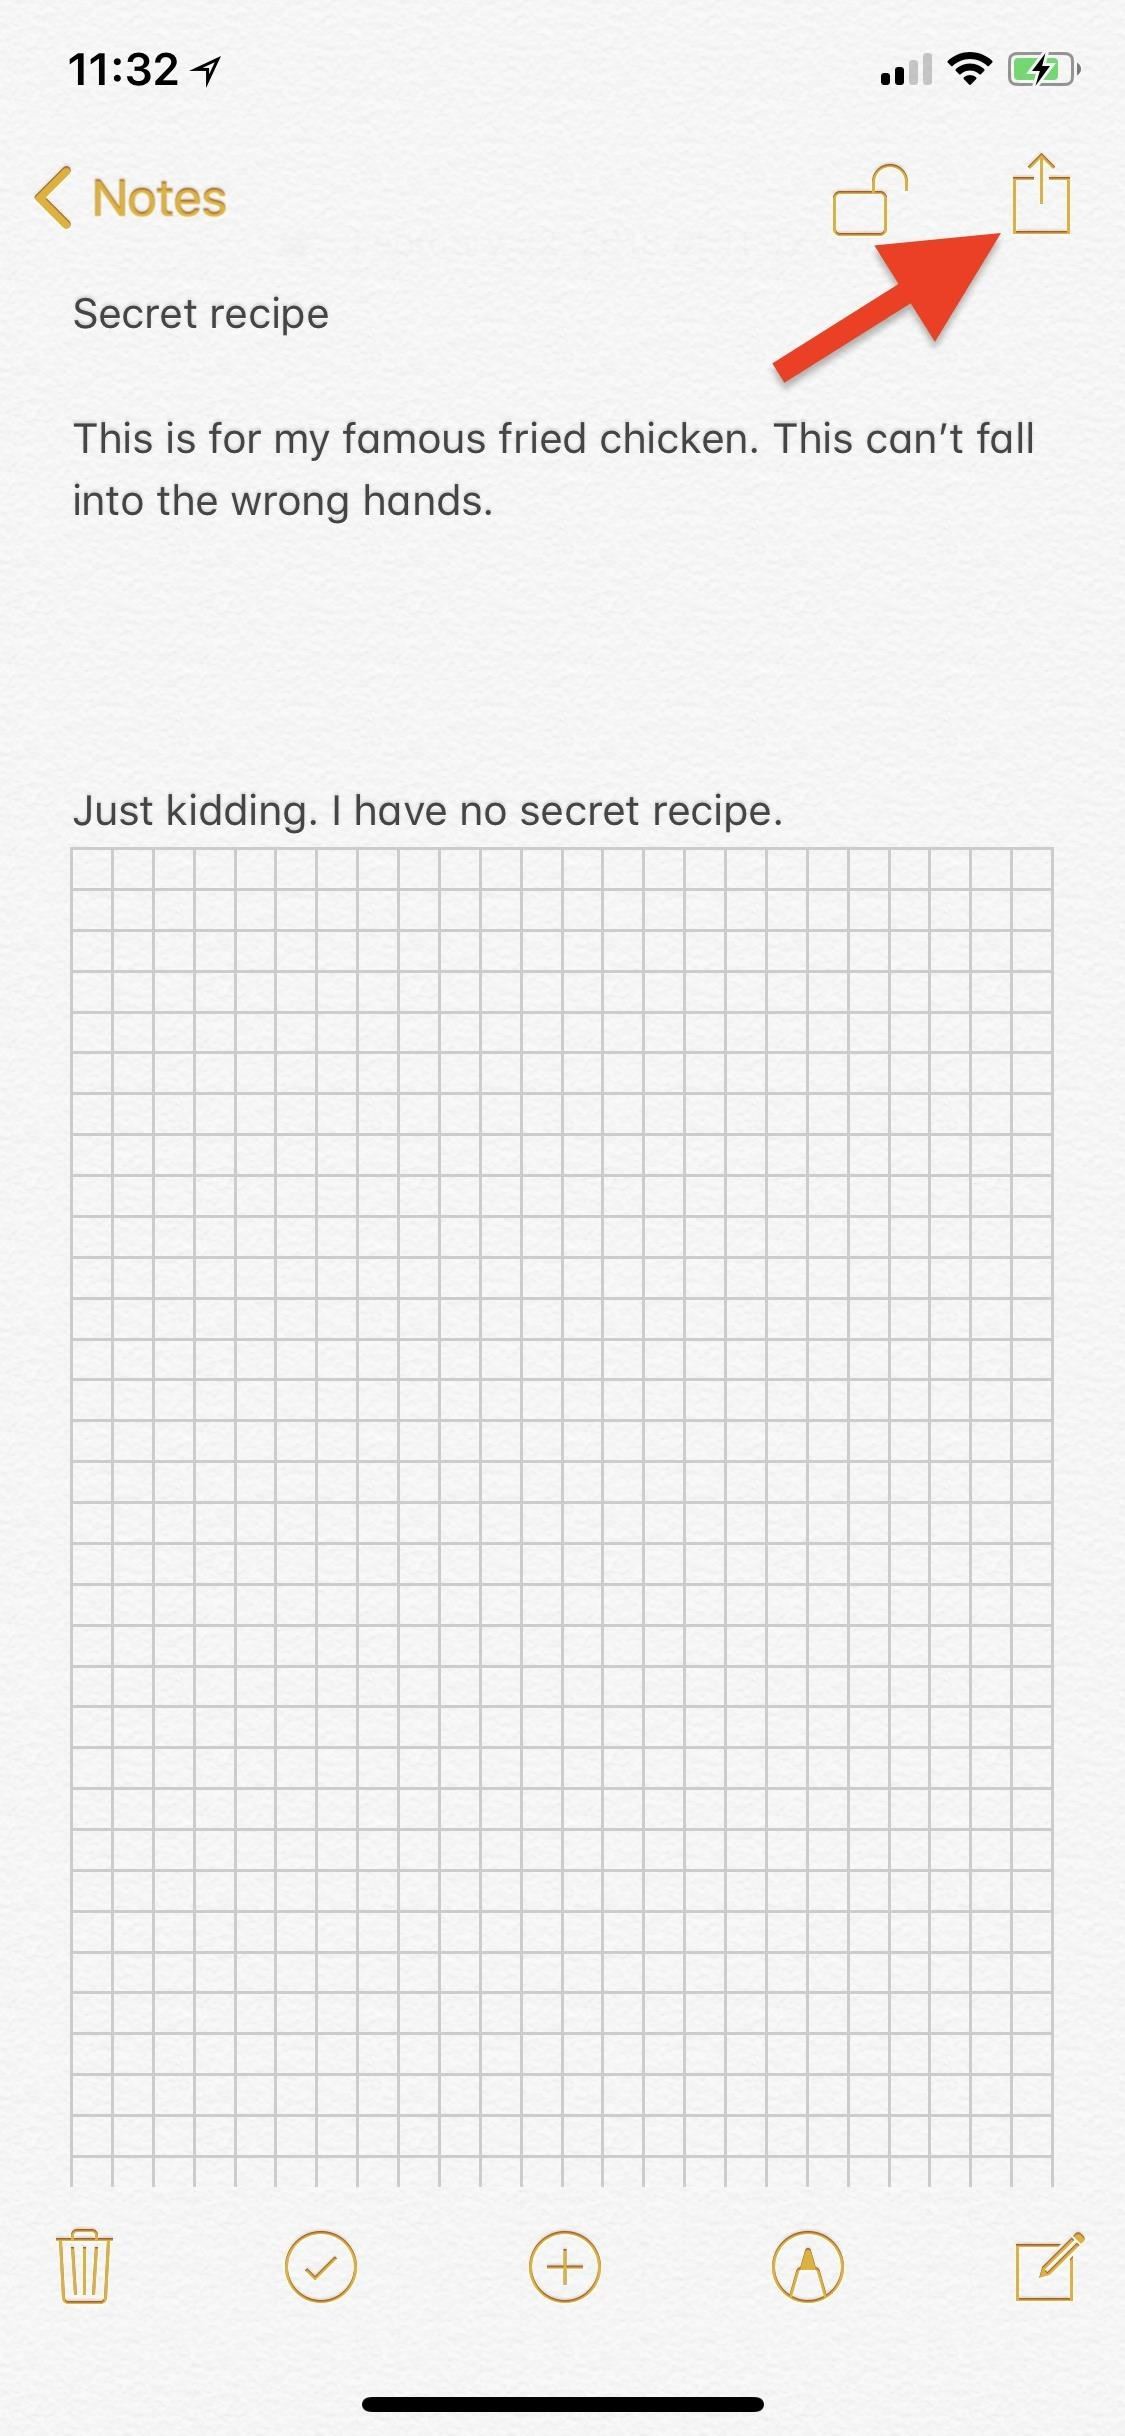
Step 8: Remove Locks or Delete (If Needed)Whenever you find yourself in a situation where a locked note no longer needs to be protected, you can easily remove the lock from it. Just tap on the note in question to access it, then unlock it as described in Step 4 above. Next, tap on the share sheet icon, and tap on "Remove Lock" from the activities row. That's it.Alternatively, you can use 3D Touch to peek at the note, then swipe up quickly while peeking to reveal some options. Tap on "Remove Lock" to do so. If you ever want to delete a protected note, all you have to do is swipe left on it from the folder list, then tap on the red trash can button, or 3D Touch to peek at the note, then swipe up and select "Delete." You will need to unlock the note first before it will work if it's not already unlocked. Alternatively, you can just open up the note, then tap the trash can icon in the options bar.Don't Miss: How to Password-Protect Photos & Videos Inside NotesFollow Gadget Hacks on Facebook, Twitter, YouTube, and Flipboard Follow WonderHowTo on Facebook, Twitter, Pinterest, and Flipboard
Cover photo and screenshots by Justin Meyers/Gadget Hacks
How to Pair a Bluetooth Device to Your Computer, Tablet, or Phone
How To: Customize The "Slide to Unlock" Text on Your iPhone's Lock Screen to Say Whatever You Want News: Your iPhone's Lock Screen Is Getting Better Widgets, Notifications, & More in iOS 10 News: iOS 11.4.1 Beta 2 Released for iPhones with No Real Bug Fixes or Improvements
How to Remove the Carrier Name from Your Lock Screen in
When you block someone, you also won't be able to do things like start a conversation with them or add them as a friend. Keep in mind that blocking someone may not prevent all communications or interactions (example: in apps or groups) and only affects your interactions with that person on Facebook.
How to Delete Friends on Facebook? - Techspirited
Android is all about customization: "Be together. Not the same," as Google's latest ads for the platform put it. Changing your device's boot animation, for instance, is one of the many great ways you can add a touch of personal flair. Up until now, though, boot animation mods mainly consisted of
How to customize Android Boot Animation? - appslova.com
Lg Vn251s Cosmos 3, Verizon Wireless (Black) and struggled to send and receive text messages. It would run its battery down quickly hunting for signal. Messages
How to Transfer Text Messages from LG to Computer (Windows/Mac)
How to Store Vinyl Records. Vinyl records are a wonderful way to experience both retro and modern music. Typically preferred by audiophiles for their lossless analog sound, these records provide large, beautiful versions of albums from all
The best way to package vinyl records for shipping - a step
This video shows how to hack google, learn and hack.. Subscribe Now..!! This video shows how to hack google, learn and hack.. Subscribe Now..!! Skip navigation Sign in. Search.
Google hacking - Wikipedia
To find anything from the Start menu (in full-screen or partial-screen mode), just start typing. You can search for anything from Start by typing on the keyboard. For example, to search for an HP app, type HP on the keyboard. A list of all HP apps displays.
How To Find and Download Software and Drivers for HP Products
Turn a 'toy' radar gun into the real thing! Works great! Cops don't even have one like this! While this is a completely new and different design, my inspiration for this video is from an article
How to Wire a radar detector directly into your dashboard
We've already shown you how to install the older version of Xposed, but it was actually a complicated process back then for the HTC One.Now, it's super easy. To install the newest Xposed Framework, you will need to root your HTC One and have "Unknown sources" enabled.
How to Install the Xposed Framework on Android 6.0
Linux Journal Presents: Email is one of the least private and least secure forms of communication, although few people realize this. MixMaster is one way to allow secure, anonymous communication even over the very public medium of email. This tutorial will get you started with MixMaster quickly and easily.
How to Send an Anonymous Email - Your Guide to Anonymity | VPNpro
These hashtags should help you get noticed. While Instagram popularity should never be a yardstick by which you measure the quality or success of your work, it does remain one of the best avenues
How to Grow Your Audience With Hashtags for Instagram
4 ways to turn off annoying notifications on your Android phone or iPhone Weed out the random calls, messages and alerts, and focus only on the ones that really matter to you.
How to Block Heads Up Notifications while Gaming or Watching
0 comments:
Post a Comment