How To: Unlock the Bootloader on Your OnePlus 6T
Before you can dive into customizing your OnePlus 6T, you must take the initial step of unlocking the bootloader to gain the ability to install TWRP, Magisk, custom ROMs, and other mods.A bootloader is a program that starts up on a device that states what operating system it is running through official means. This official firmware is locked down by default, but unlocking your bootloader will allow you to make any changes using an alternate firmware of your choosing.An everyday use case scenario for unlocking the bootloader is to install a custom recovery, such as TWRP. This will give you the ability to flash custom kernels, ROMs, and any Magisk related files all the same. This includes the core Magisk system for gaining root access and modules as well.DisclaimersUnlocking the bootloader will factory reset your device. Your phone will now fail SafetyNet checks, but Magisk can fix it. Unlocking the bootloader will not void your OnePlus warranty.
Step 1: Back Up Your DataIt's important to note that unlocking the bootloader will always factory reset your device, so it would be advisable to make sure you back up your data. This is the case with all devices, not just the OnePlus 6T, so do keep that in mind for future reference.Connect your phone to a computer through a USB connection and enable either MTP or PTP transfer mode, which you can set by tapping the notification that appears when you connect the USB cable. Now it's a matter of navigating to your phone's internal storage through the computer's file browser. From there, drag and drop any files or folders you wish to save onto the computer and you are good to go!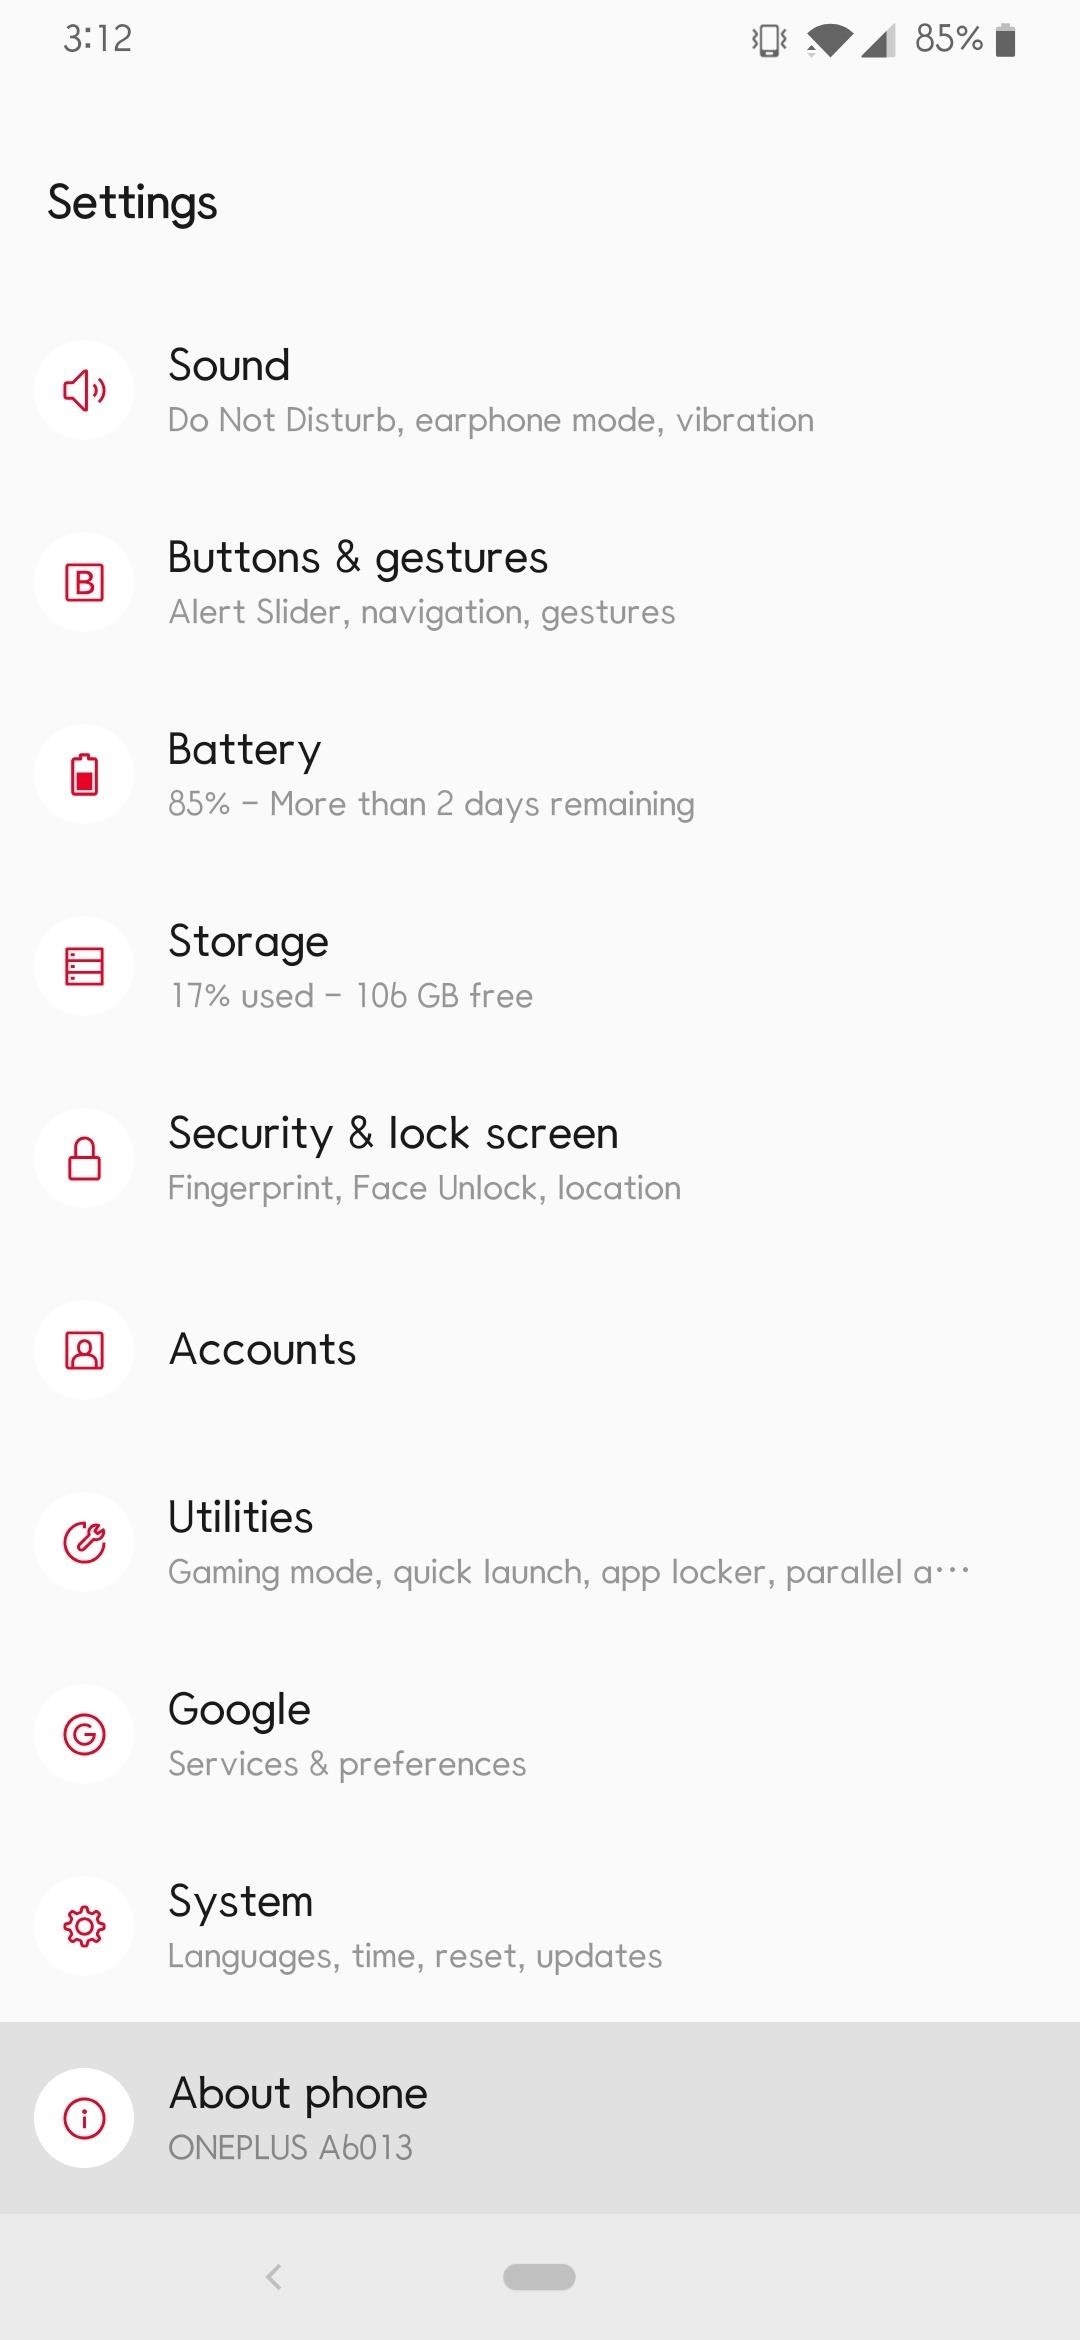
Step 2: Enable Developer OptionsEnabling the developer options will give you access to a setting that gives your phone the ability the unlock the bootloader. You want to go into Settings –> About phone, and from there, scroll down and locate the "Build number" field. Tap anywhere in this field 7 times in rapid succession until it grants you developer access.If you have any security settings in place, it will prompt you to enter your password so you can grant your phone full access to the developer options. Once you correctly enter your password, you will see a toast notification letting you know the developer options have been enabled.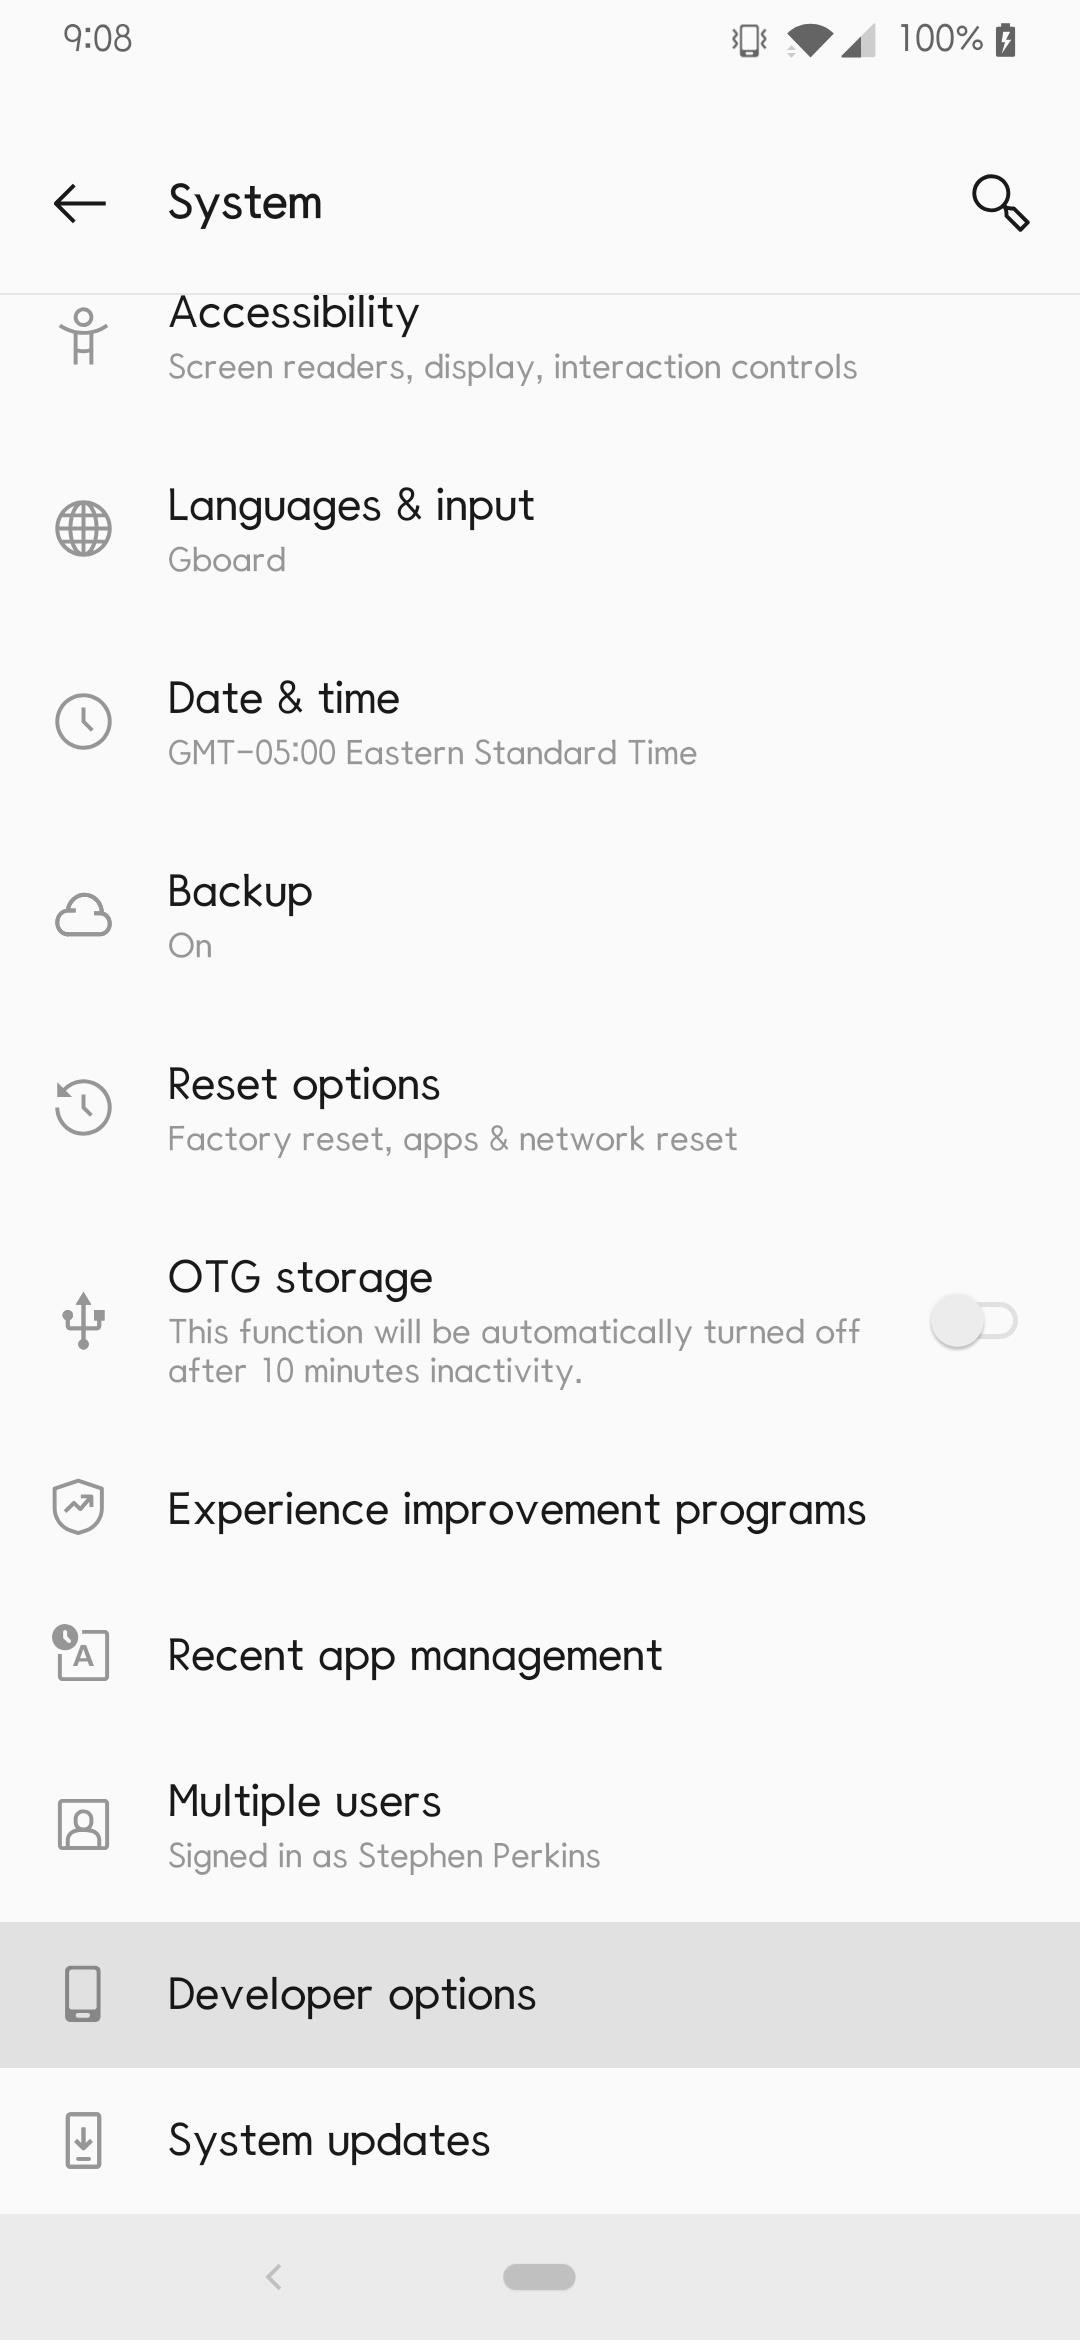
Step 3: Enable OEM UnlockingWhile still in the "About phone" section, tap the back button once to return to the main Settings page. Next, head into "System," scroll down if you have to, and then tap the "Developer options" section. Find and tap the "OEM unlocking" option to toggle it on, then enter your PIN or password if you are prompted to do so. After that, a new popup will be presented to you, from there you tap "Enable" to turn this option on.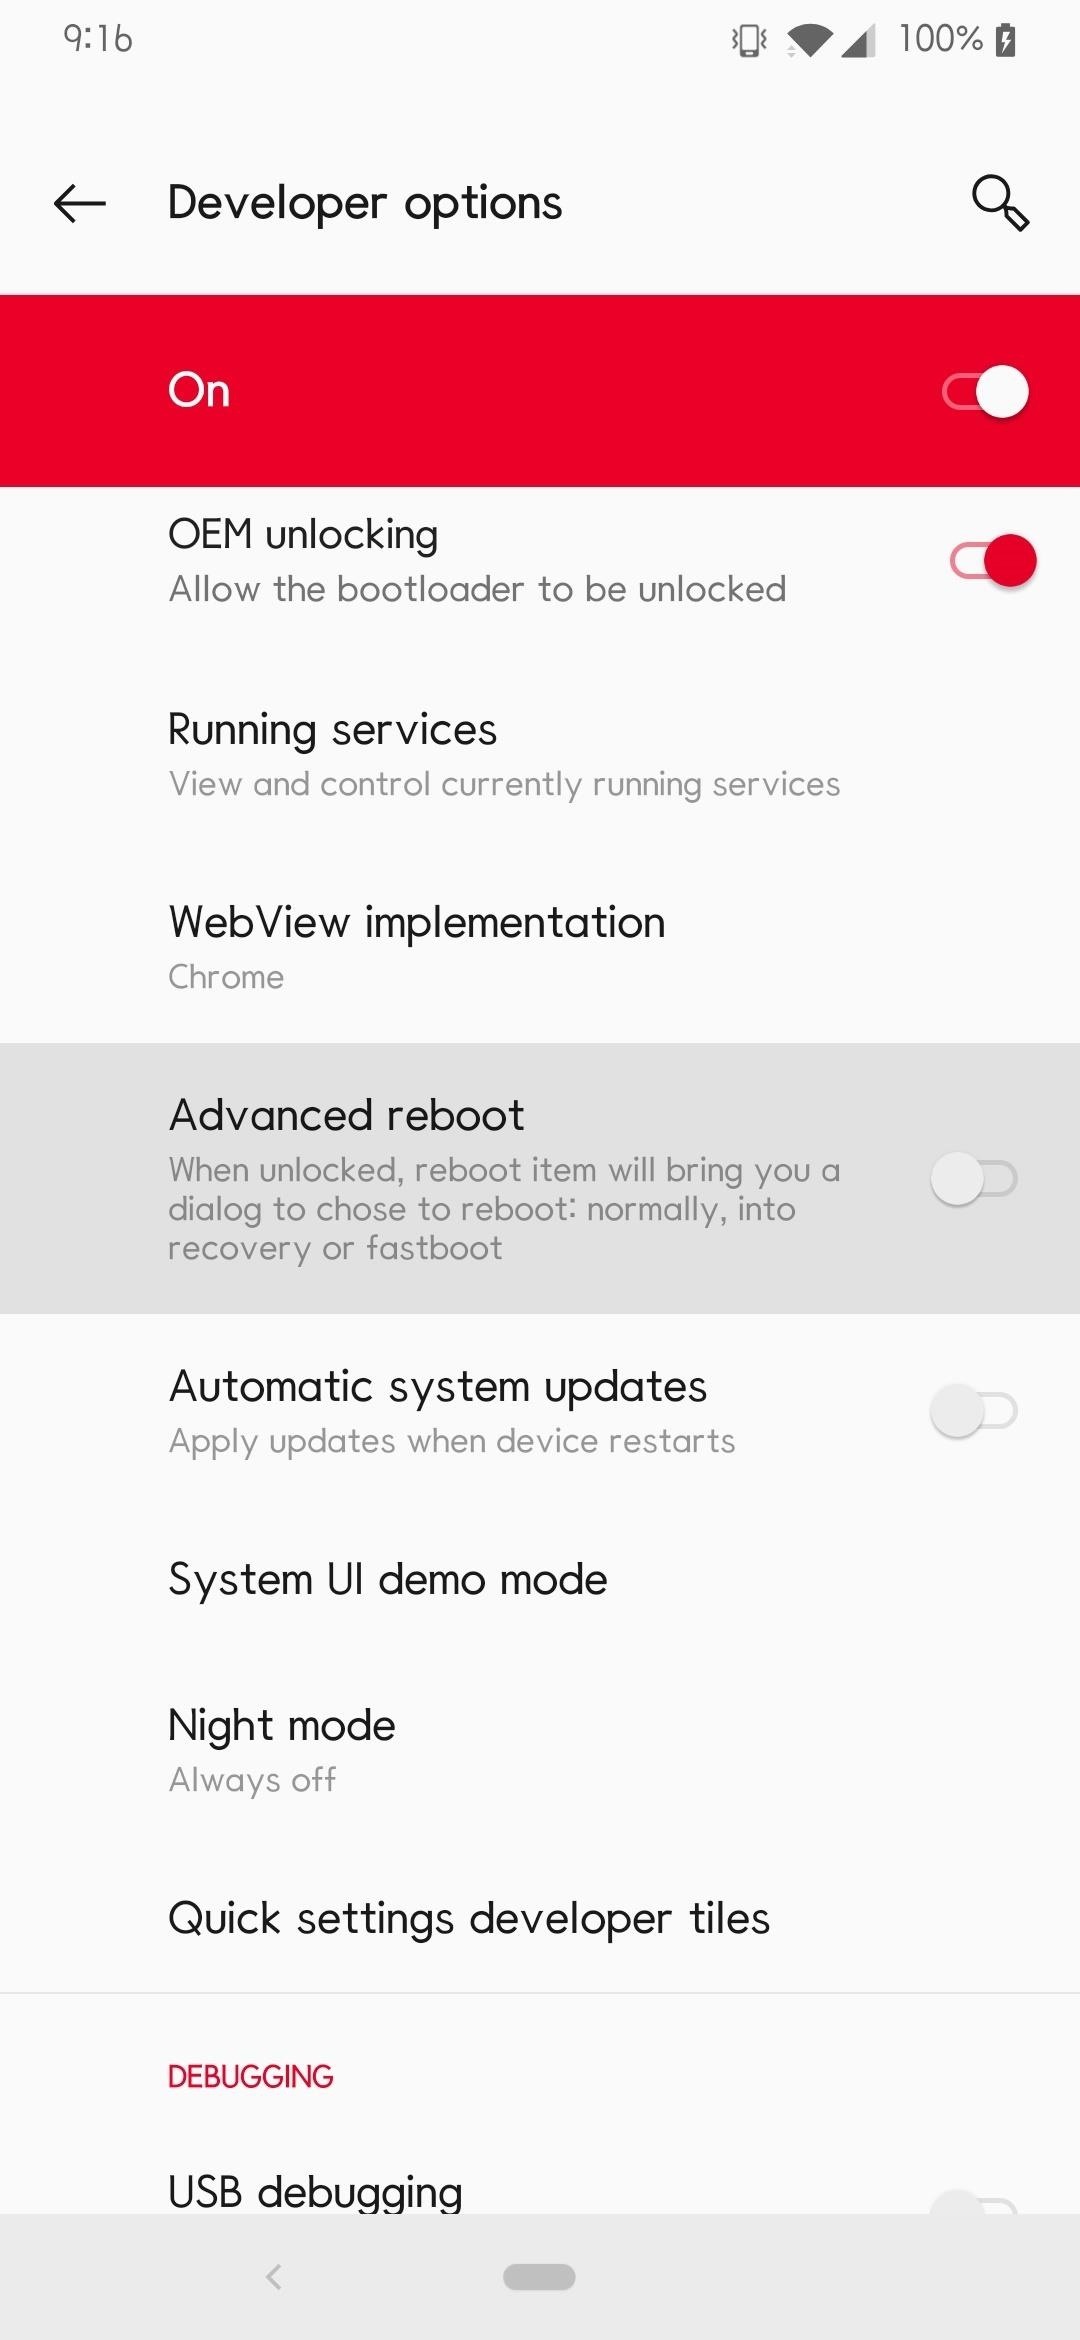
Step 4: Enable Advanced RebootWhile in the developer options page, scroll down a little until you find the "Advanced reboot" section and enable this setting. This will allow you to boot into fastboot mode without needing a computer or having to use a button combination.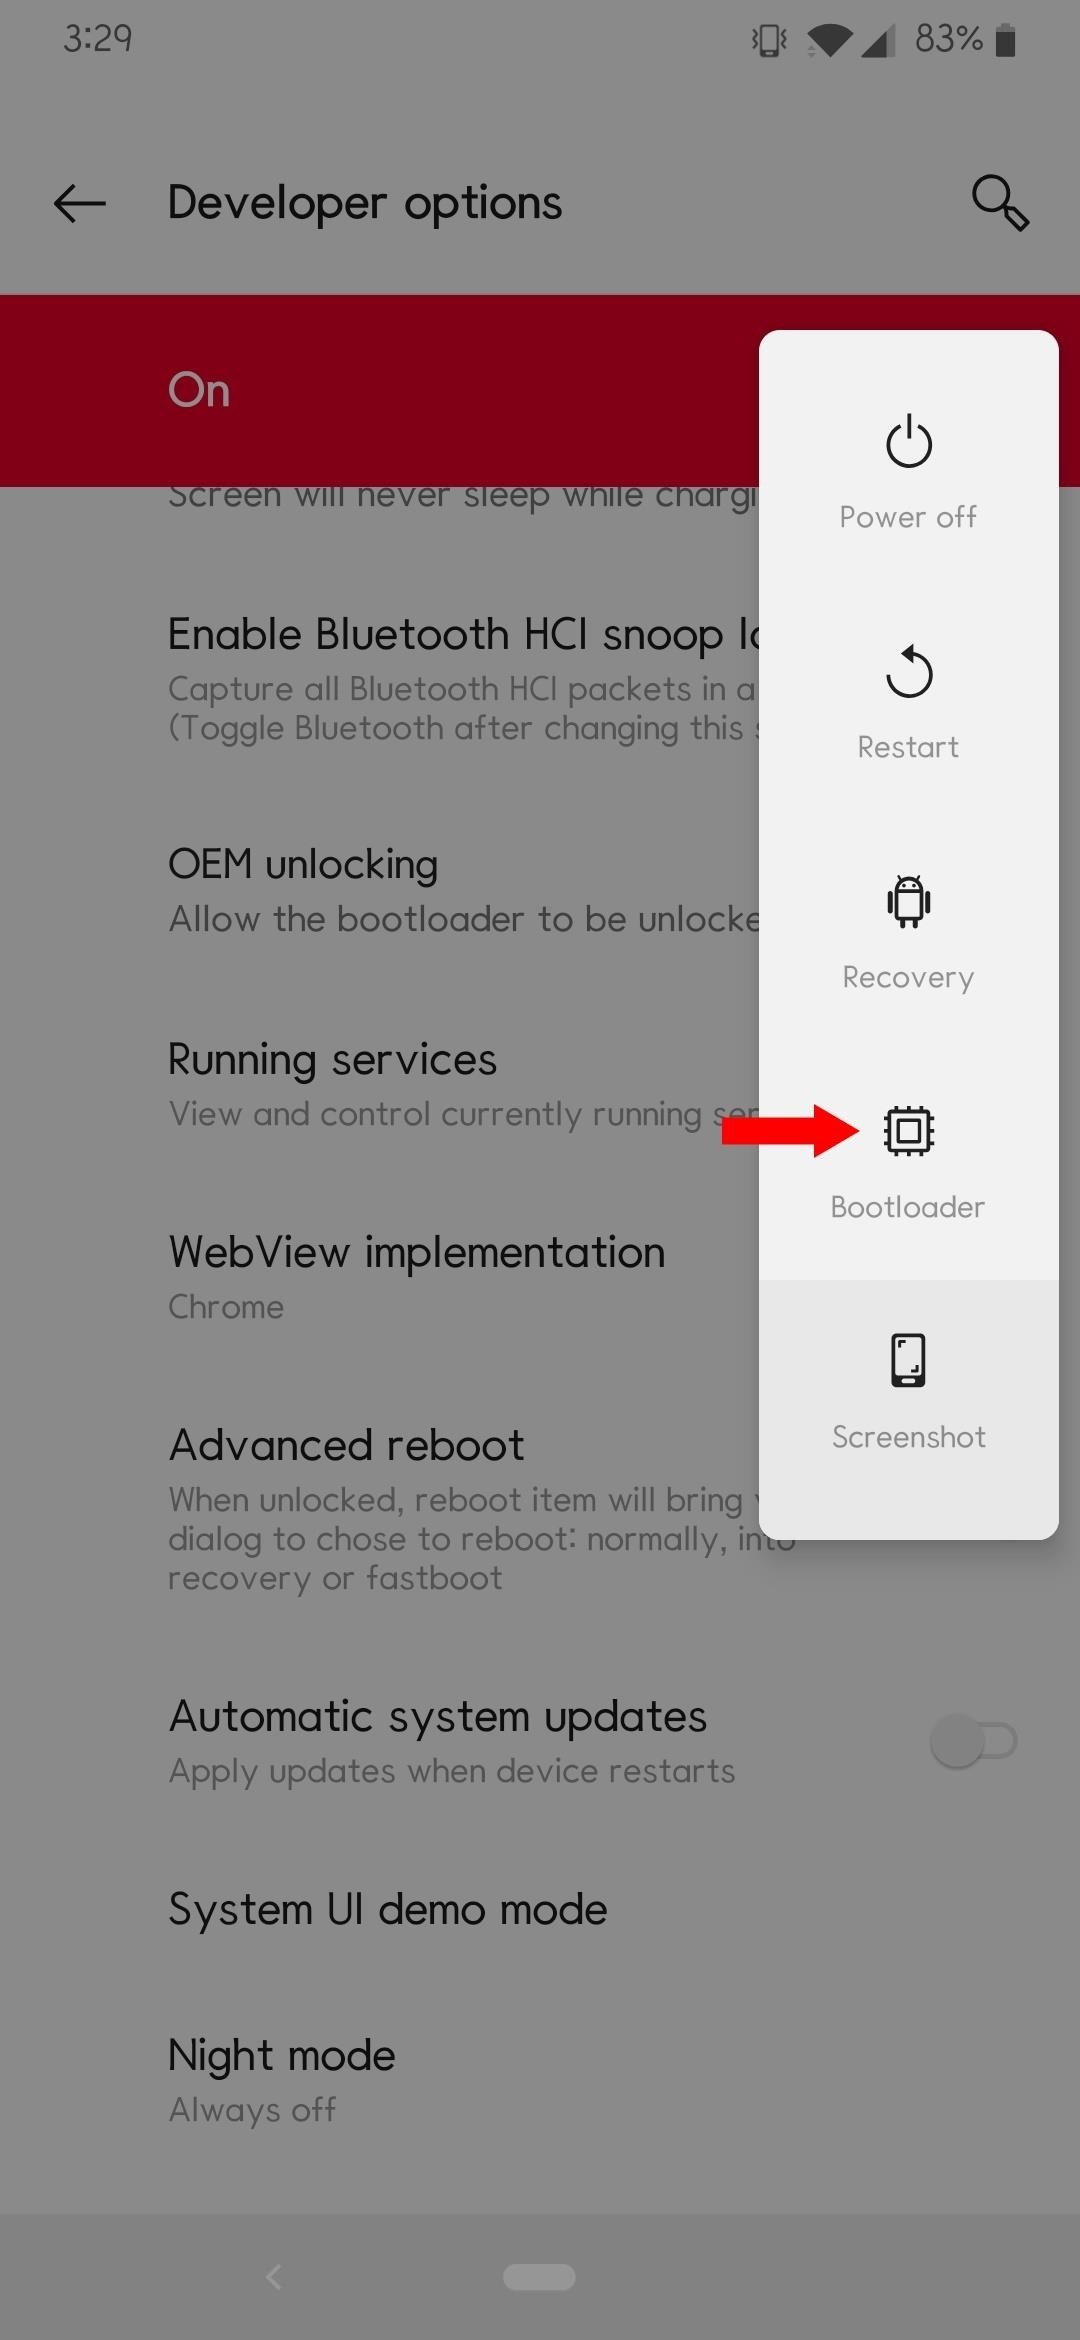
Step 5: Boot into Fastboot ModeAfter you have enabled the Advanced reboot option, hold the power button to bring up the power menu for the device. Tap the "Bootloader" option, and your phone will immediately begin to restart to the bootloader main menu. Now is an excellent time to connect your phone to a computer via a USB connection for the next steps of the guide.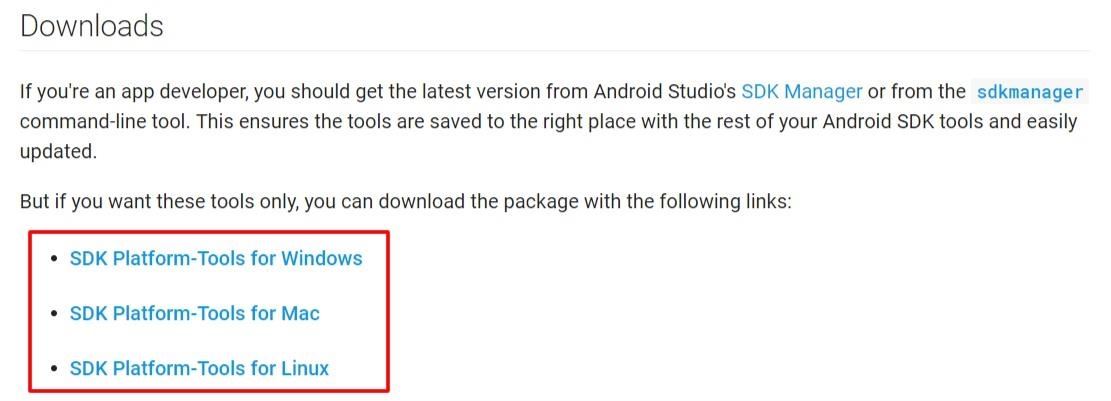
Step 6: Install Fastboot on Your ComputerIf this is your first time unlocking a bootloader, you must install Fastboot onto your computer if you have not already. There once was a time where you would have to install the Android SDK along with a variety of other things, but that is no longer necessary. It used to be a bit of a lengthy process, but lucky for you, Google now offers something called "SDK Platform Tools," which includes the core files you need for Fastboot and ADB commands. No need to overly complicate things, right? Keep it simple with a local-only install!To obtain the latest platform-tools release, which is currently at version 28.0.1 (September 2018), download it directly from Google:Download the latest Platform-Tools package from Google If you prefer system-wide commands, you can learn how to set your computer up for that environment:How to Install Fastboot on Windows, Mac, or Linux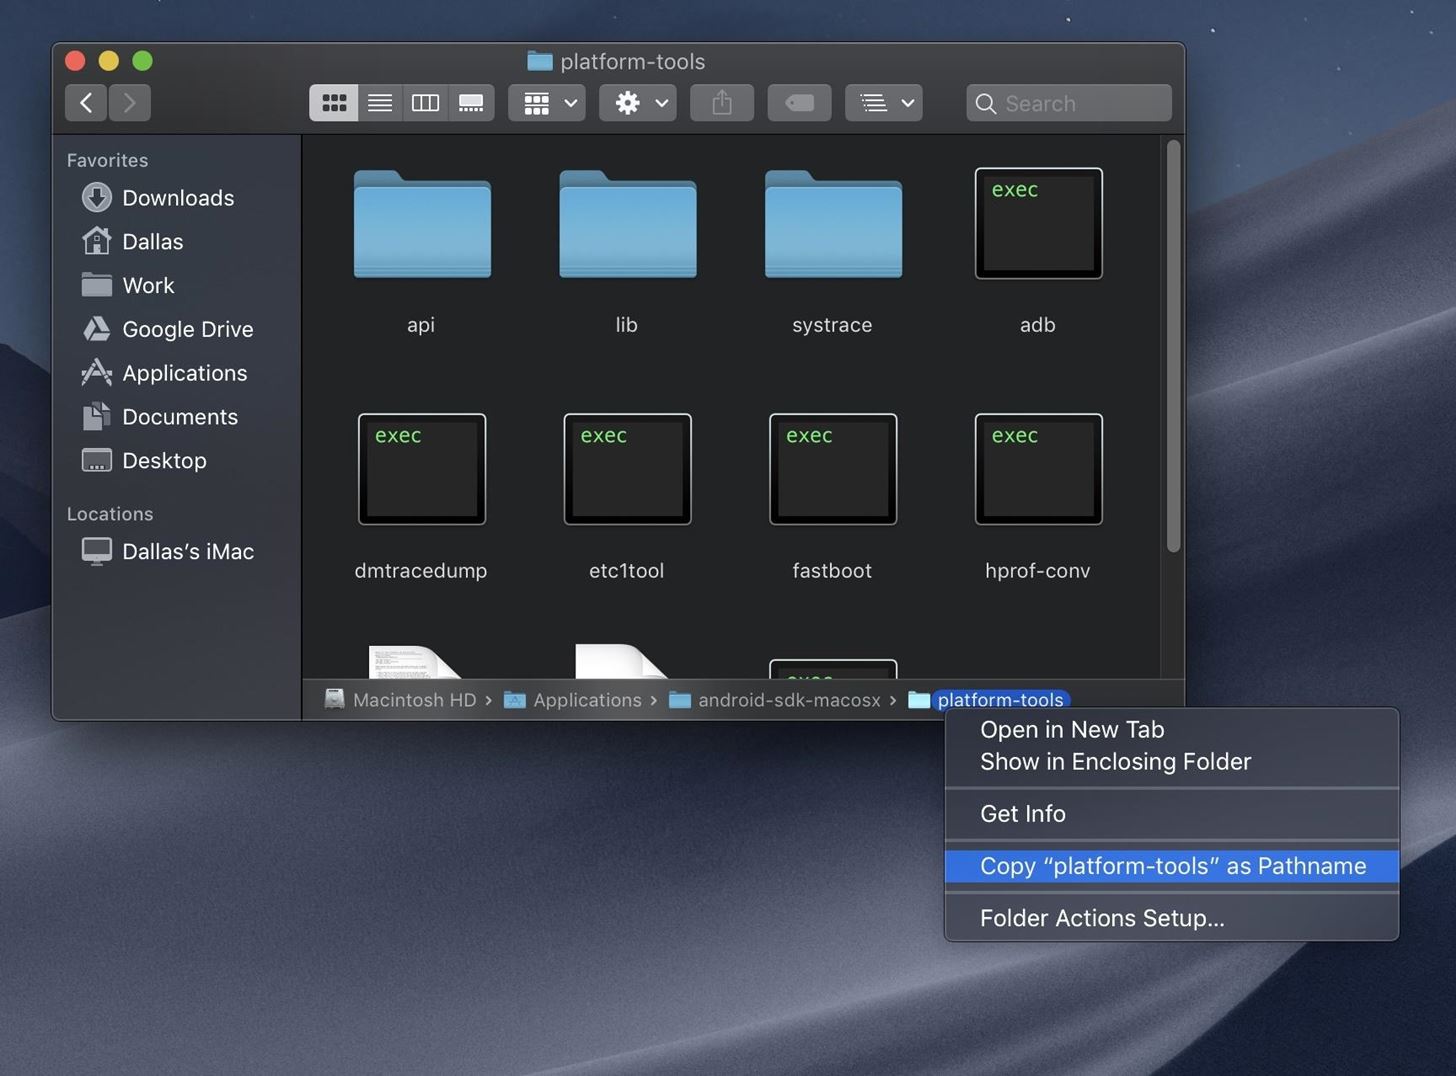
Step 7: Open a Command WindowSince we have simplified things by opting to use a local-only install for Fastboot, it's as simple as extracting the platform-tools folder you downloaded from Step 6 to any location of your choosing. The benefit of doing a local-only install makes for an easier install process while allowing you to move the folder around at any time freely. For now, extract the platform-tools folder to your computer's desktop, but after you are finished with the guide feel free to move it to a location that works best for you.Head into the newly extracted platform-tools folder and copy the location of this folder from the address bar at the top of the window. If you're on macOS Mojave and you're having trouble copying the folder location, open the platform-tools folder in Finder, press cmd+opt+P to toggle the path bar overlay, then right-click the "platform-tools" portion of the path bar at the bottom of the window and choose "Copy as Pathname." Next, locate the appropriate command prompt or terminal window for your operating system. On Windows, bring up your start menu (Windows key) and do a search for "cmd" and then hit enter to open the terminal application. For Linux and Mac systems, open the "Terminal" program from the applications folder.Once you have the terminal program running, you now want to redirect it to your platform-tools folder so you can begin unlocking your bootloader. Start by typing in "cd" then include a space, followed by pasting the location of your platform-tools folder you got from earlier. Once you have done that, hit enter to point the terminal program to this directory so you can use the Fastboot commands.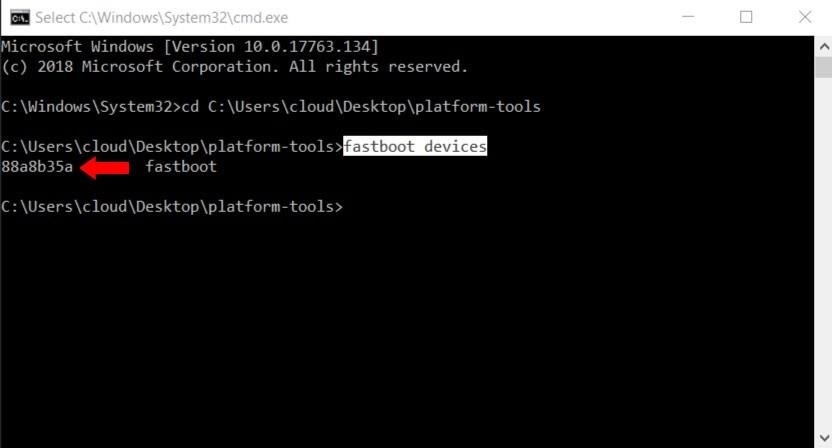
Step 8: Verify Your Phone ConnectionYou need to make sure your computer is properly communicating with your phone to execute Fastboot commands. To do so type the following command and then the enter key: fastboot devices Note: Mac and Linux users will most likely have to add a period and a slash before entering any of the commands listed here (e.g., ./fastboot devices).Successfully running this command will show a grouping of numbers and letters, which is the unique identifier for your device.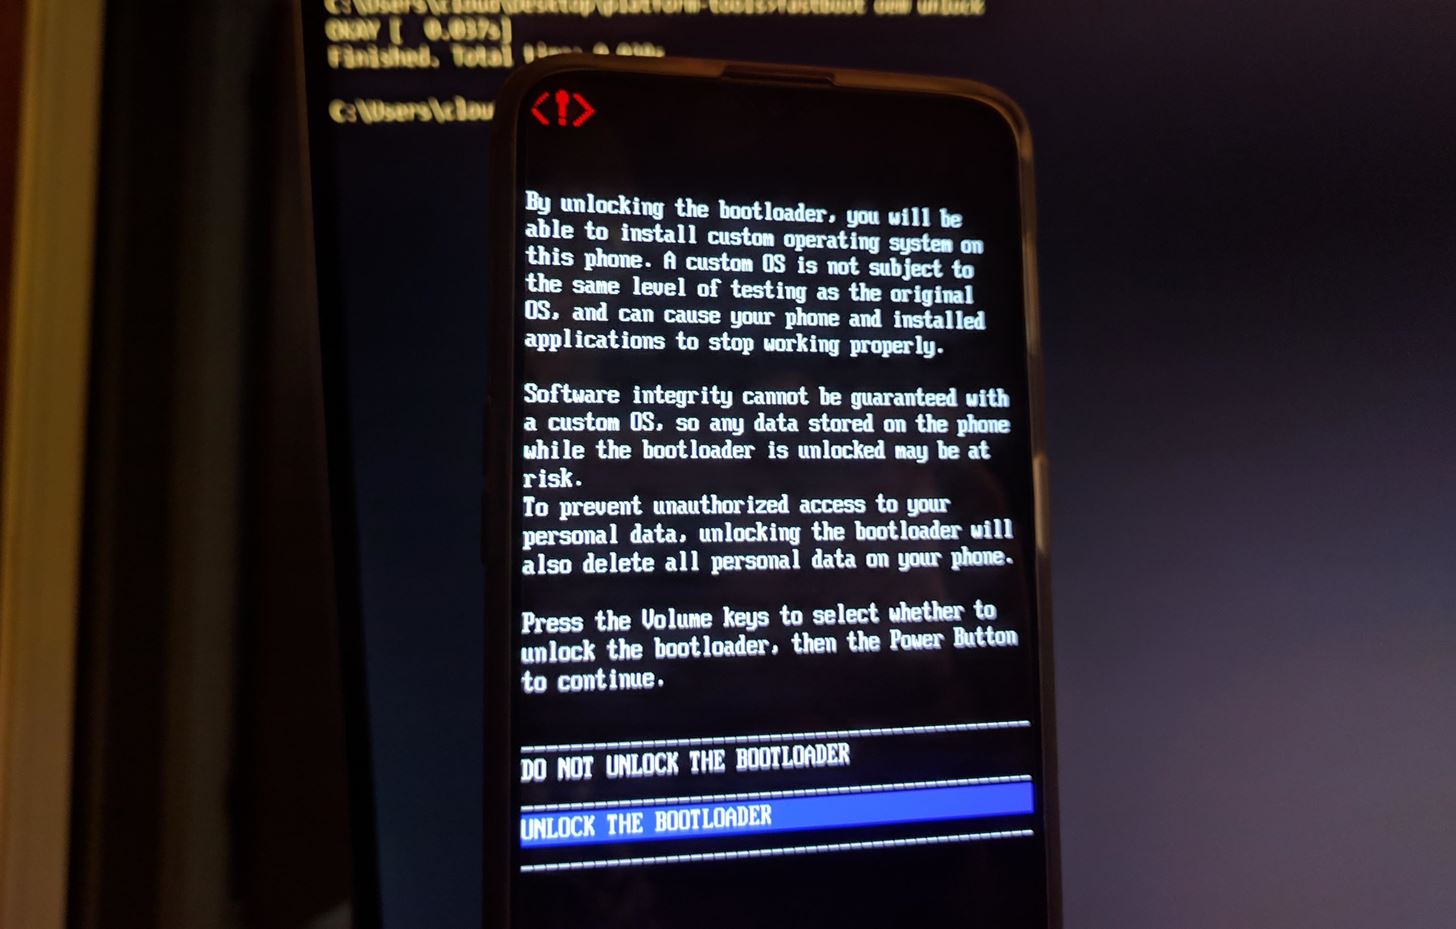
Step 9: Unlock Your BootloaderOnce your phone is all set up with Fastboot and your computer recognizes it as such, you can finally begin the final step to unlocking your bootloader. Type the following command and then hit the enter key (don't forget about the ./ if you're on Mac or Linux): fastboot oem unlock You will now see a new prompt on your phone's screen asking you to verify the unlocking stage for the bootloader. Highlight the "Unlock the bootloader" option by using the volume keys, and then press the power button to confirm it. From here, your phone will reboot automatically and begin wiping your data clean, as stating it would do from the start. Once the process completes, your bootloader will now officially be unlocked! The initial data wipe and reboot could take a few minutes, so be patient while it does its thing. You then go through the standard setup of your device, and you are good to go from there (e.g., sign into your accounts and restore data).As a side note, "The bootloader is unlocked, and software integrity cannot be guaranteed" is a message that alerts you upon every system reboot. This is a regular occurrence and does not impact your system at all, so no need to worry about that!Don't Miss: The Best Phones for Rooting & ModdingFollow Gadget Hacks on Pinterest, Reddit, Twitter, YouTube, and Flipboard Sign up for Gadget Hacks' daily newsletter or weekly Android and iOS updates Follow WonderHowTo on Facebook, Twitter, Pinterest, and Flipboard
Cover image and screenshots by Stephen Perkins/Gadget Hacks
flash the encryption disable zip (you find it in the download folder too. note he needs to get flashed every time you reflash a vendor partition) MAKE SURE YOU HAVE IT ON EXTERNAL SD CARD SINCE I CANT ADD MTP SUPPORT TO TWRP OR MTP WILL BE BROKEN WHEN SYSTEM IS BOOTED; press reboot to recovery in twrp for boot rooted with magisk.
How to Root Your Nexus 7 in Less Than Two Minutes—Without a
How To: It's Raining Sweets and Treats! How to Make Your Own Pneumatic Candy Cannon How To: Make a potato gun, otherwise known as the spud gun How To: Build a potato gun launcher w/ interchangeable barrels How To: Building a Steampunk Hand Cannon, Part 1: How to Make a Wooden Gun Stock
About: me is a word often used by person to represent themselves , or it can be used to represent a belonging , as an example : For who is this pen? Its for me! More About thethiny » In this tutorial you will learn how to make a Nintendo 64 Portable , this was not made by me , it is made by borjaus
Build a Portable Super Nintendo - ExtremeTech
I Turned My iPhone Into a Vibrator Using Apps. This Is My Story. All you need is a body safe-silicone sleeve and maybe Here are the three apps I tried: 1. Perfect Mobile Massager for
10 Important Steps for Producing a Quality News Story
How To: SSH into your iPhone or iPod Touch with an easy method How To: SSH into your iPod Touch or iPhone without wifi How To: SSH into a iPod Touch or iPhone using Filezilla How To: Use your iPad, iPhone, or iPod touch as an external display
How To: Connect to Your iPhone Via SSH | iSource
isource.com/2008/04/01/how-to-connect-to-your-iphone-via-ssh/
How To Connect to Your iPhone Via SSH. Topic Description: SSH (secure shell) is a network protocol that allows data to be exchanged over a secure channel, in this case between a computer and your iPhone. If you have a jailbroken iPhone, an SSH connection over a wireless network is often the best way to browse your iPhone, carry out simple file
How to SSH to an iPhone or iPad - OS X Daily
osxdaily.com/2011/08/04/ssh-to-iphone/
You may know already that iOS has the same underlying unix architecture as Mac OS X, and because of this you can SSH into an iPhone or iPad just like you would connect to any other Mac or unix based machine. As it turns out for us nerdier users, this ability is disabled without a jailbreak, so in
How to SSH into iPhone/iPod Touch using WinSCP (Windows)
All of these issues can be attributed to an uncooperative third-party app on your Nexus device. To be sure that's the problem, rebooting into "Safe Mode" is the way to go. Safe Mode is a little-known feature on Nexus devices that reboots the system with all third-party apps disabled. Use the device in Safe Mode and take note if your problem
Boot into Safe Mode & Disable All Third-Party Apps on Your
Welcome to SheetMusicFox! Download hundreds of thousands of free public domain sheet music titles. SheetMusicFox.com News Septemeber 28th, 2012 - Our iPhone/iPad app is out! Now you can access your sheet music wherever you are! August 6th, 2012 - Complete redesign of SheetMusicFox with over 200,000 sheet music titles!
Free Sheet Music Downloads at Musicnotes.com
RCS messaging is becoming more popular these days, and Google and the GSMA are helping to promote the new service. Here's what you need to know.
What is RCS messaging? Here's all you need to know about SMS
You see them all over your Instagram Stories feed — post after post, video after video of dramatic, silly, or otherwise fun zooms. Your friends are showing off their lives through the lens of a Hollywood blockbuster, and you can do the same. Luckily, it's quite easy to accomplish, whether you're running iOS or Android.
How All Your Friends Are Adding Fun & Dramatic Zooms to Their
How To: Turn Off Your Android's Screen with Your Fingerprint Scanner How To: Make the Fingerprint Scanner Work Faster on Your Galaxy Device How To: Lock Apps Using Your Samsung Galaxy S6's Fingerprint Scanner How To: Use the fingerprint scanner on an Lenovo X60 Tablet PC
How to Use Intelligent Scan to Unlock Your Galaxy S9 Faster
How To: Get the New Pixel Launcher from Android O on Almost Any Phone How To: Brighten Your Google Pixel's Display by Up to 20% How To: Get the Entire Google Pixel Experience with One Simple Mod How To: Get the Pixel's Fingerprint Swipe Notification Gesture on Other Devices
Just did this Skrillex pixel art. « Minecraft :: WonderHowTo
0 comments:
Post a Comment