How To: Get the Most Out of Google's New Inbox by Gmail
Google's new Inbox by Gmail service wants to fundamentally change the way you handle email, so a bit of a learning curve is to be expected when you're first using the utility. As of right now, the service is invite-only, but if you were lucky enough to get in on the ground floor, you're probably wondering, "How the heck do I use this thing?"The basic premise is relatively simple—Inbox is a task-oriented system where you either deal with things as they come in, or put them off until later. But, if you're one who communicates regularly through Gmail, thousands of pre-existing emails can make setup seem like quite the daunting task. Please enable JavaScript to watch this video.
Worry not, my friend, because once you get to know your way around Google's new Inbox service, making your email work on your schedule is easier than ever.
Step 1: Learn the Inbox LingoThere are three basic ways to deal with a new email in Inbox—Pin, Snooze, and Sweep.To pin an email means that this particular conversation is a top priority, and thus should remain at the top of your inbox. A message that doesn't require action until a later time should be snoozed so that it reminds you to deal with it when the time comes. If it's a one-and-done message, go ahead and read it, then sweep it away. Another important aspect of the Inbox experience is the ability to Bundle messages together. Think of this as a souped-up version of Gmail's Labels feature—emails can be categorized into groups so that they can be dealt with together.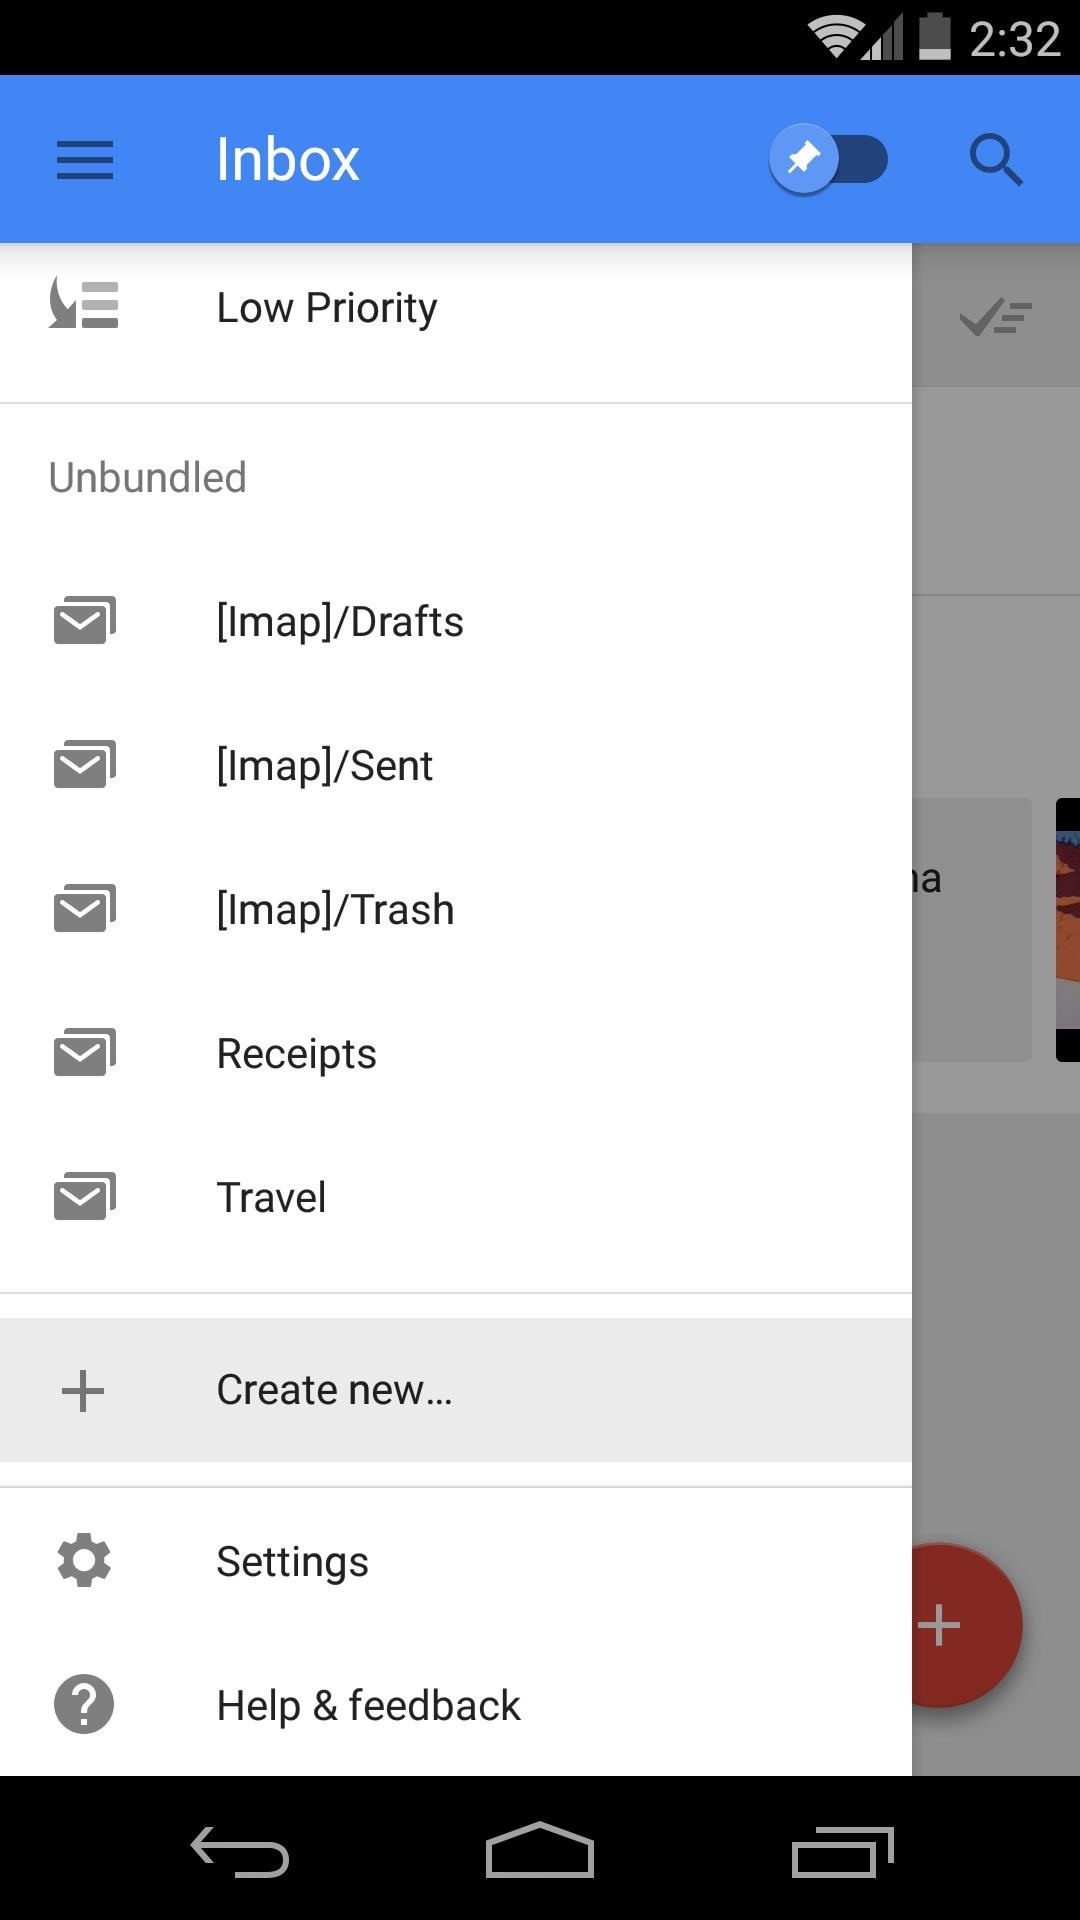
Step 2: Add Bundles to Your InboxBefore you get sucked into your old ways of dealing with emails one at a time, take the newness of the Inbox experience as an opportunity to change some habits. Inbox Bundles allow you to categorize your emails, and these groups can be pinned, snoozed, or swept away as one.Inbox automatically creates a few Bundles for you, so a lot of the work is already done. But creating your own personalized Bundles is easy—just head to the sidebar in the mobile app or web version of Inbox, then select Create New. (1) Inbox Mobile App, (2) Inbox Website From here, go ahead and name this Bundle—something like "Work" or "Personal," for instance. Then, select the Add option to give this Bundle qualifiers such as an email addresses or keywords. You can set your Bundle to automatically group messages by sender, meaning that emails received from any set of addresses will show up together. Keywords from within the messages can also be used to group emails into Bundles. When you're done with setup, make sure to enable the Bundle messages in the inbox option if you want this Bundle to show up at the top of your Inbox when new emails are received.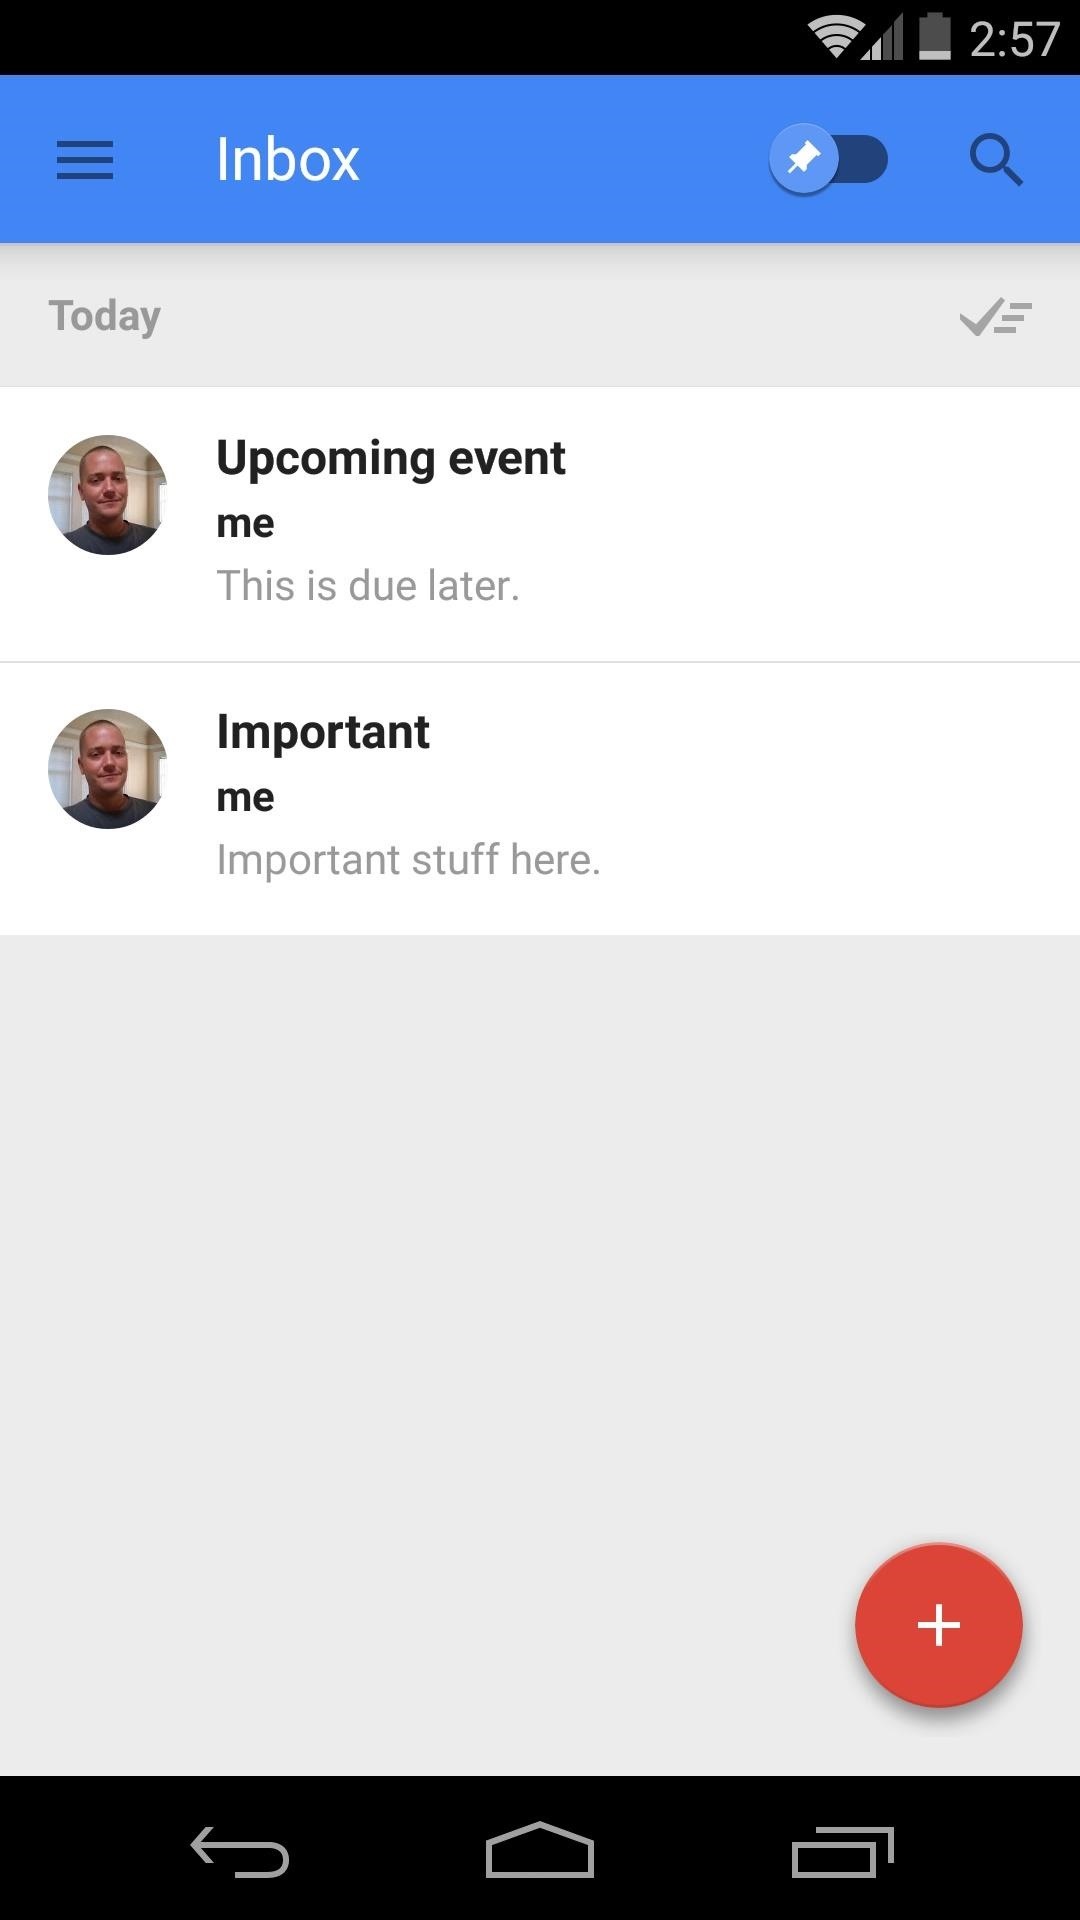
Step 3: Pin Important Emails & Snooze Upcoming EventsWith your Bundles now set up, it's time to start thinking about email from the Inbox perspective. If you have any ongoing conversations that need to be dealt with immediately, go ahead and pin those to the forefront of your Inbox. Things that aren't due until a later time should be snoozed. When you select the snooze option, you'll be asked when you'd like this email or Bundle to be brought back to the forefront of your Inbox.
Step 4: Sweep Previous Emails AwayWith your Bundles set up and important messages either snoozed or pinned, the rest of your Inbox is just clutter. Old habits may make you reluctant to dispose of your previous messages, but don't worry—sweeping away messages simply gets them out of your way, it doesn't delete them.Go ahead and tap the sweep icon at the top of your Inbox (it looks like a checkmark with speed lines). Inbox will inform you that all unpinned emails will be marked as done. At this point, your Inbox should be ready for the modern age of email. Communications that are current should be pinned to the top, and upcoming snoozed events will make their way back around when they become relevant. Similar messages are bundled together so that they can be dealt with as one, and the remaining conversations that you're already finished with are now swept out of the way.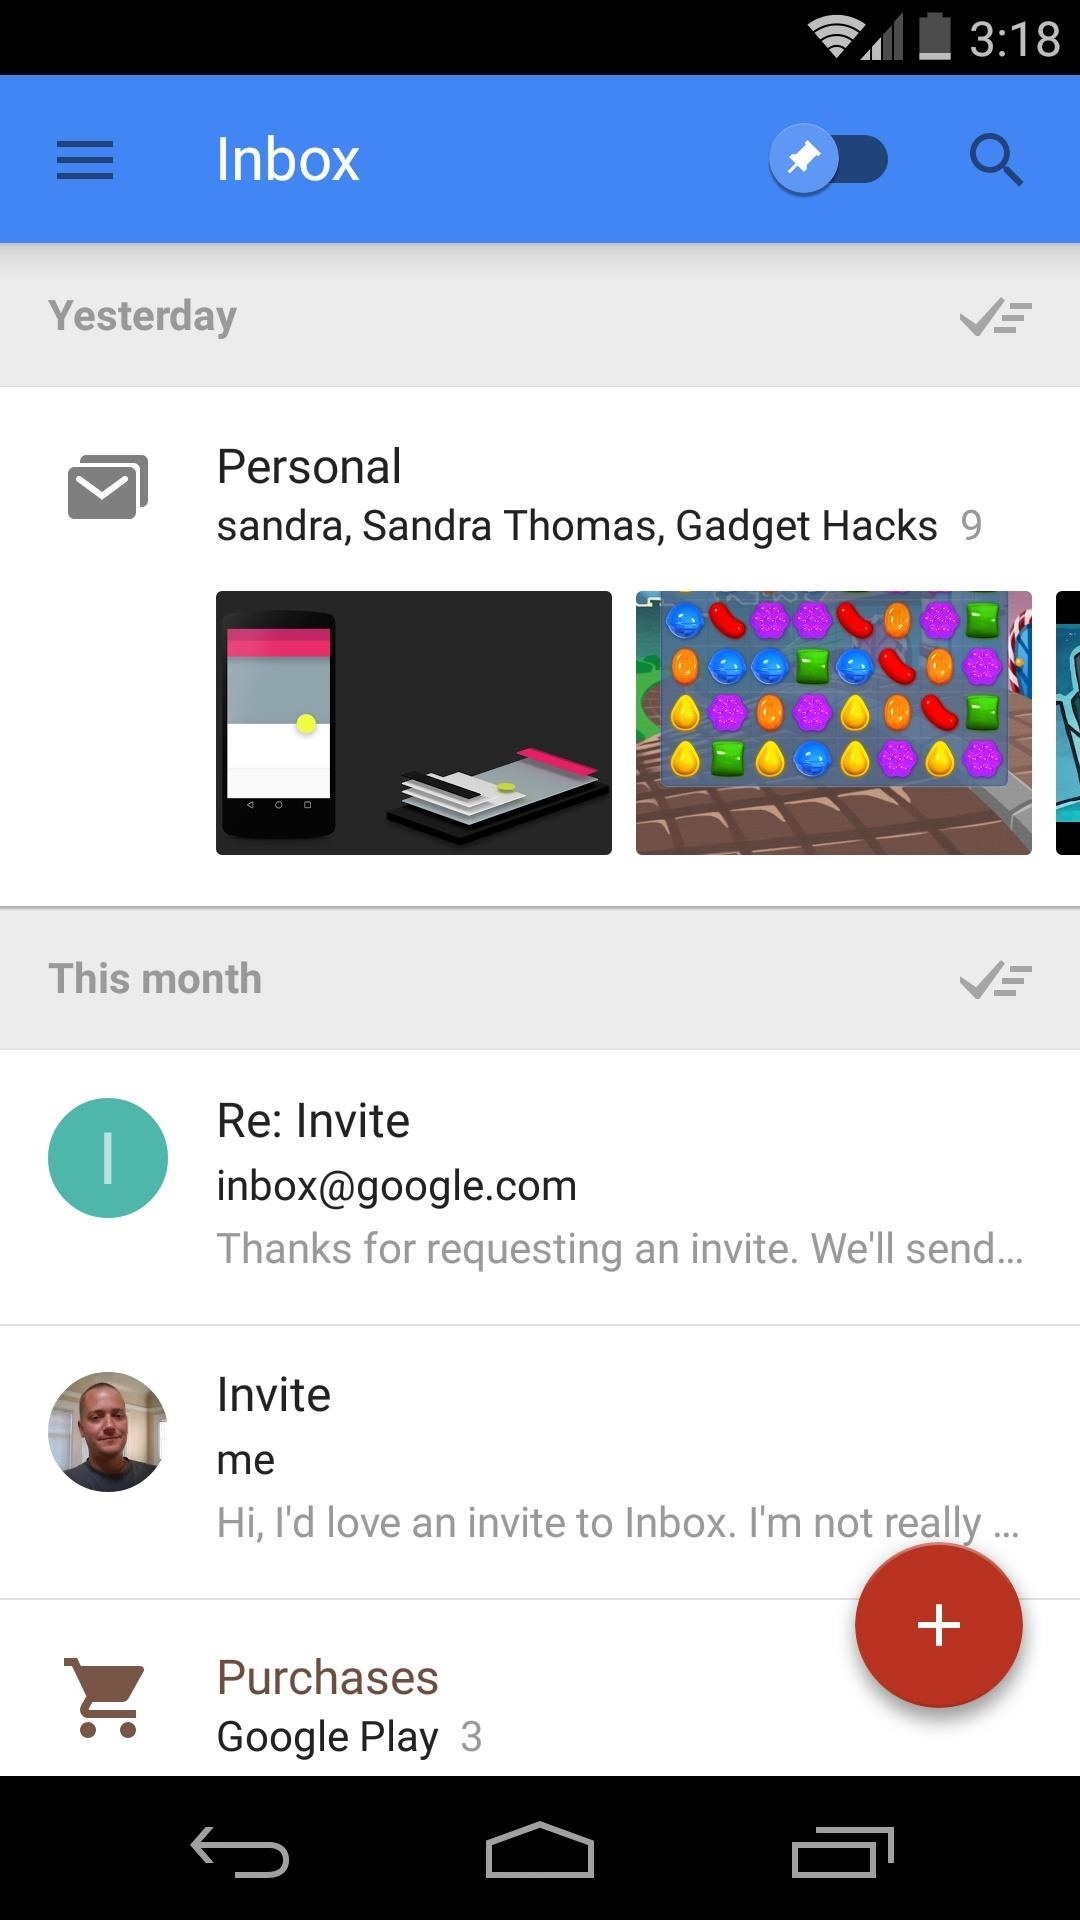
Step 5: Using Inbox Going ForwardFrom now on, think of your Inbox more like you would a to-do list. When new emails come in, pin, snooze, or sweep them away accordingly, and watch your productivity shoot straight through the roof.Another great feature that Inbox offers to help you stay on top of things is a baked-in Reminder function. Tap the floating "+" icon near the bottom-right corner, and in addition to quick links to your most-contacted people, you'll find a link to this new feature. After jotting down a quick note to yourself, essentially, you can choose Save to pin this reminder to the top of your Inbox now, or you can opt to Snooze it until a later point in time. All core features of Inbox are available on both the mobile app (available for Android and iOS) and the website, but a nice set of keyboard shortcuts are exclusive to the web version. The mobile app allows you to swipe left or right on a message to sweep or snooze. Now that you have a basic understanding of Inbox, the service should help you be more productive than ever. What are some features that have helped you save time and get the job done? Let us know in the comments section below, as well as on Facebook and Twitter.
PS: If your Android device already has an LED light to use as a flashlight, find out how to activate it using the power button. Related How To : The Flashlight That Finally Lets You Adjust LED Brightness on Your Samsung Galaxy Note 2
If you are having problems with voice activation for the Google Maps App you'll want to see this video. This is a great app and easy to navigate.
Google Maps 101: How to Tweak Voice Navigation Prompts on
In this video, I will show you how to Install ANY Custom ROM on your HTC One M8. In this example I will use the Viper ROM but you can pick anything you want. How to Root your HTC One M8: http
How To Install Custom ROM on Android - xda-developers
Try toggling Contacts in iCloud on and then off again to fix it. Here's how to do that. Step 1: Launch the Settings app on your iPhone and then tap on iCloud. For users who use iOS 11 and later versions (including iOS 12), they can find iCloud by going to Settings > Your User Name > iCloud. Step 2: Find "Contacts" and turn it "ON" if it is "OFF."
Contacts Disappeared from Your iPhone? Here's How to Bring
To revive a cell phone battery, start by removing the battery from your phone. Next, seal it in a plastic bag inside a plastic container, and place it in the freezer for at least 12 hours. When you take it out of the freezer, wipe any moisture off of the battery and allow it to warm up to room temperature.
My phone died and now won't power on or charge. Here's how to
How to Lock Your Apple Watch with a Passcode to Increase
Ranked: The 7 Best Paid Word Games for iPhone & Android
If you switch phones, you'll probably want to bring your contacts along. If you're switching between ecosystems, it can be tougher. Using Gmail as a middleman, we'll show you how to sync your contacts between Apple and Samsung's devices.
How To Sync Your Mac and Windows Mobile: Contacts Synchronization
Quick Tip: Speed Up Gboard Performance on Android by Disabling These Two Settings . By Dallas Thomas; Android Hacks; Gboard 101; Ever since the update that turned Google Keyboard into Gboard rolled out, a lot of people have been noticing that word suggestions and auto-correct features are downright slow.
How to Use OptiFine to Boost Mincraft's Visual Performance to
USB OTG is a hardware and software standard that allows you to connect a device to your smartphone or tablet through the USB Type-C or micro USB port. Almost anything that uses a USB connector can be plugged into your Android device with USB OTG, at which point you would be able to control the
How to Manually Update Your PlayStation 4 to - WonderHowTo
Looking to speed up your iPhone? A battery replacement may be one of the best options. Apple has shared that it decreases iPhone performance to guard against less predictable, older batteries from
Will a new iPhone battery really speed up your device? There
Skip navigation
How to enable the hidden Dark Mode on Facebook Messenger
Turn it into a motion-sensing security camera with freeware application Yawcam. All you need is a webcam to get started, but after spending a little time in the Yawcam settings you can set
How to Turn Your Webcam Into a Streaming, Motion-Detecting
0 comments:
Post a Comment